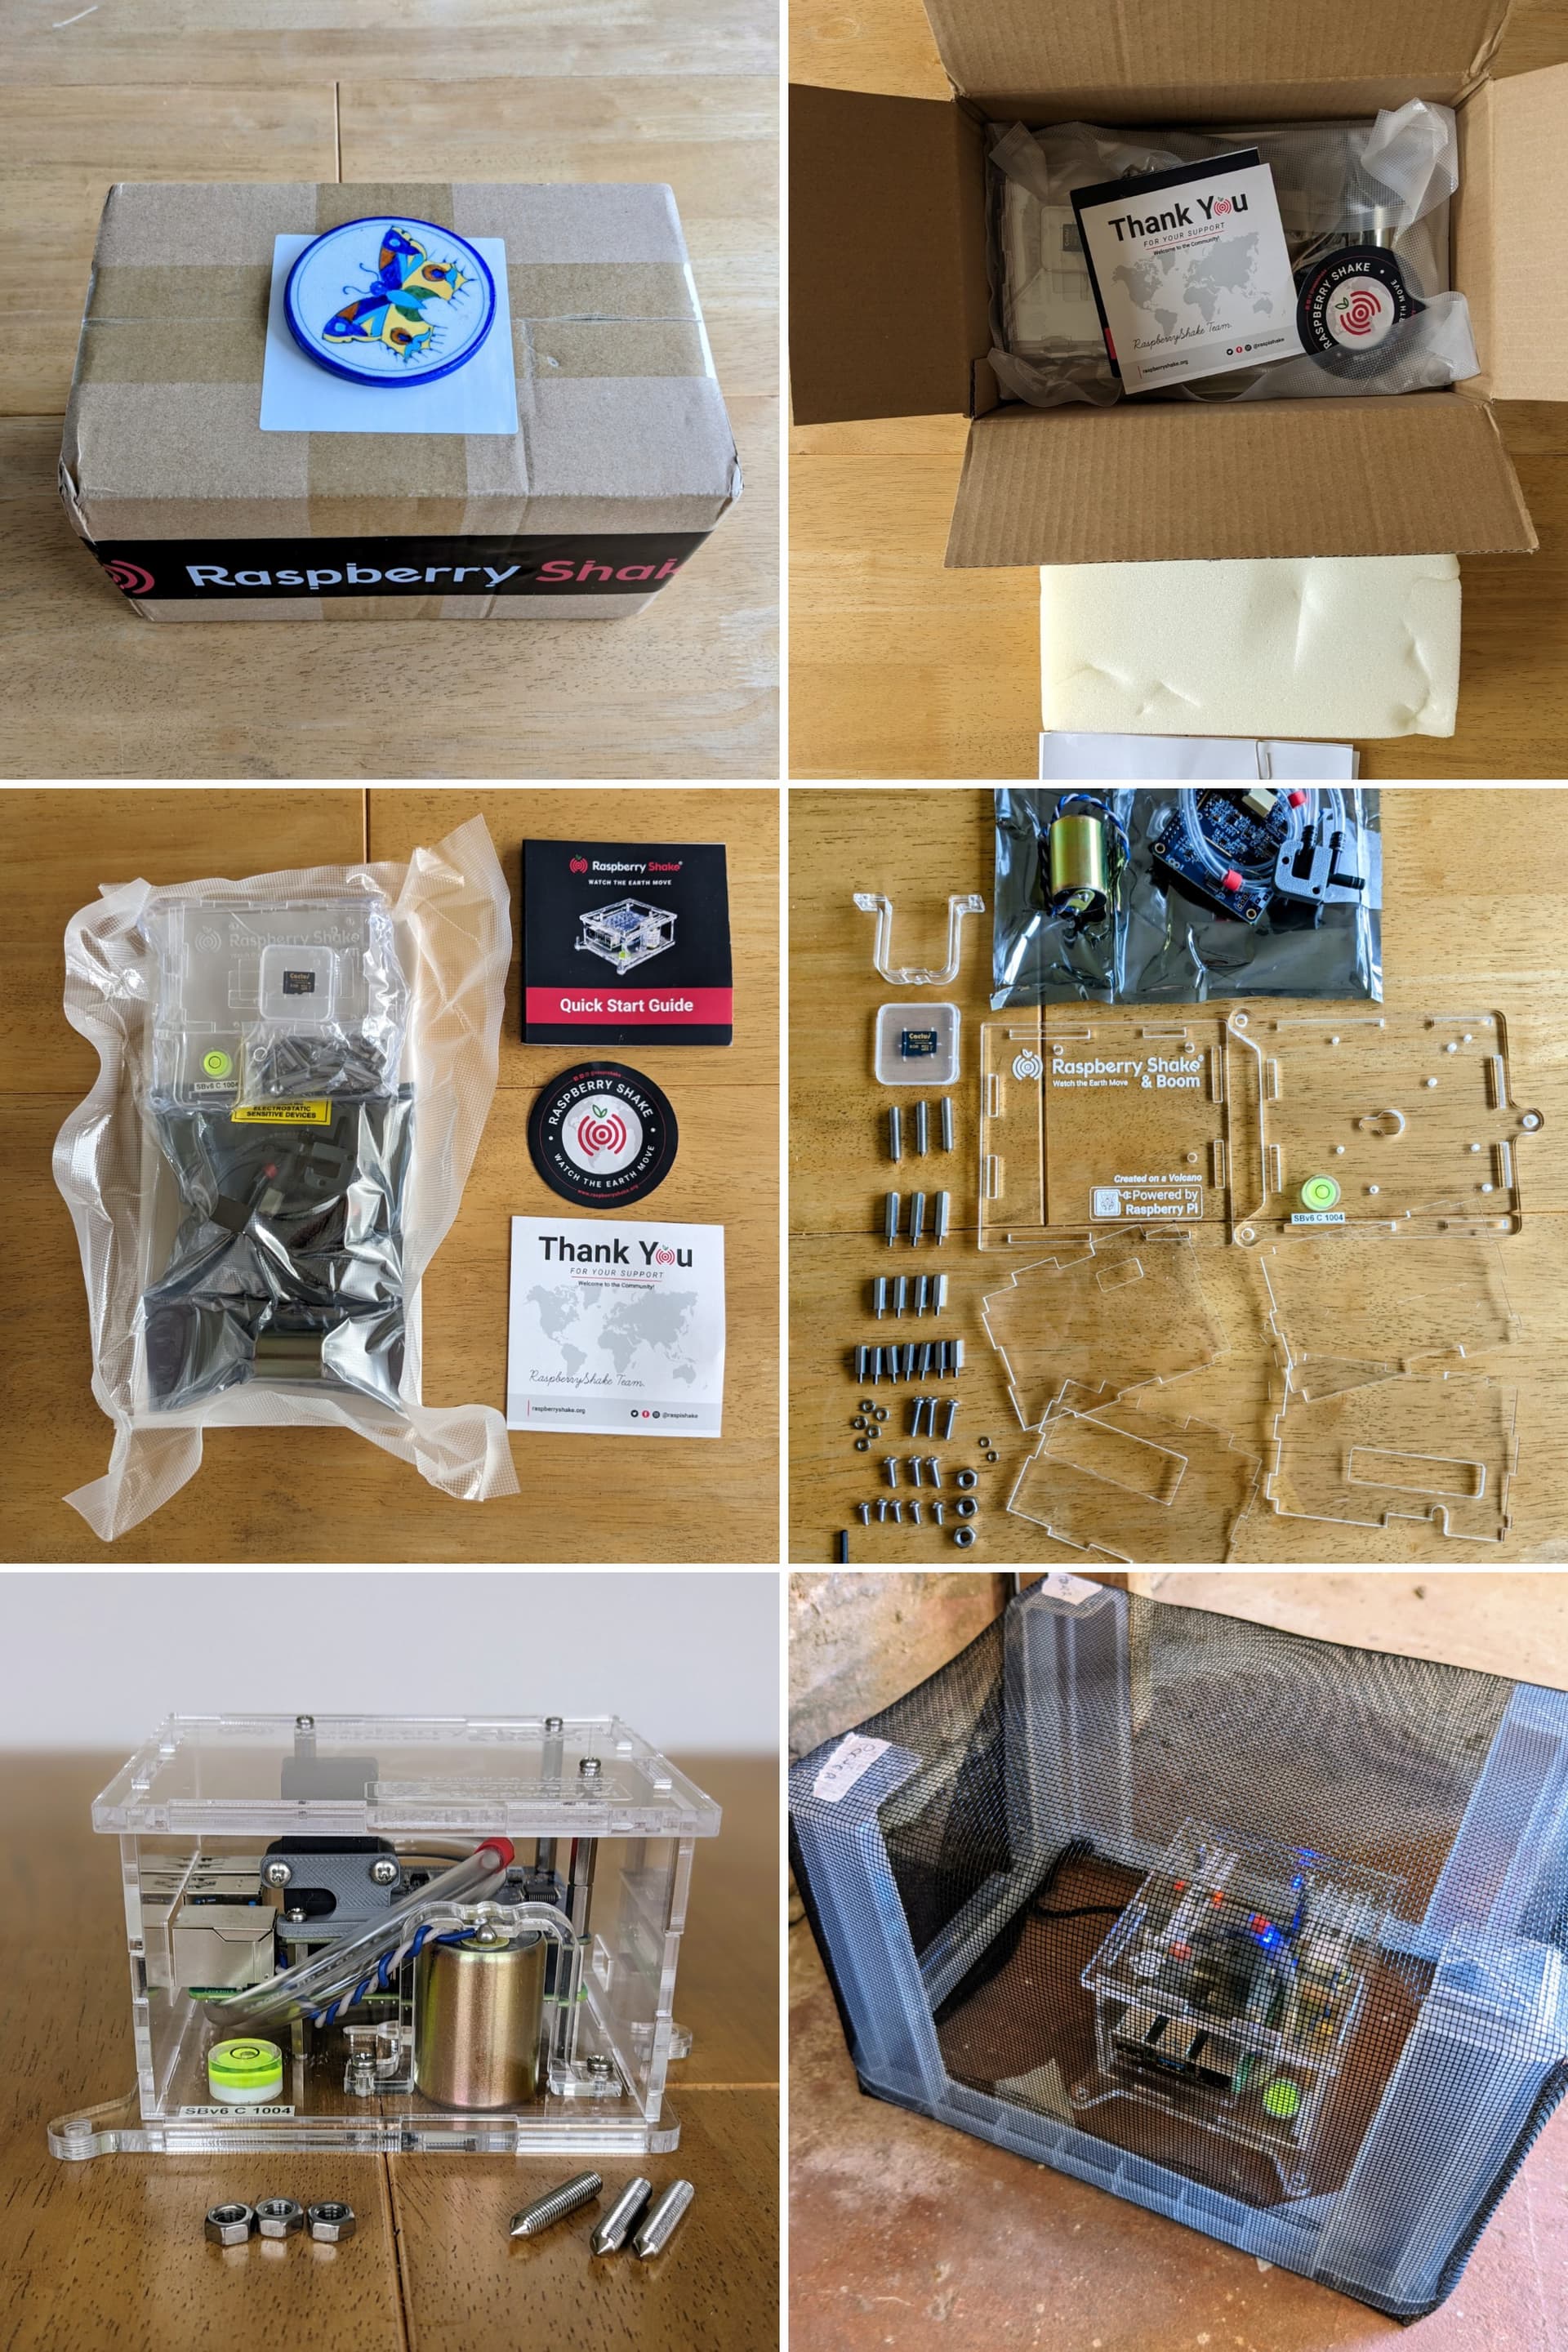
Wasn’t sure which category to place this so please feel free to move.
My RSBOOM arrived well packaged, I particularly liked the sealed bag of components. Everything was there, including spares. I followed the RSBOOM assembly video with occasional glances at the others for clarification. For those as unsure as I was here are the spacer sizing arrangement I used:
(Top)
Large
Small
Raspberry Pi
Small
RSBOOM board
Medium
(Bottom)
The pressure sensor on my SBv6 C 1004 came with the tubes already fully attached and has a slightly different mounting which is rotated on the board by 180 degrees compared to the video, this means it’s a little more effort to encourage the board onto the Raspberry Pi but manageable. I used one of the screws and washer to fasten down the pressure monitor mount, but not too much as it sits slightly proud and I didn’t want to cause any damage. Other than that everything was straight forward and as it says somewhere “no soldering required”.
I connected via Ethernet and powered on watching my router for connections but after quite a while nothing had appeared. I re-powered and it immediately sprung to life. I soon found the RSBOOM admin page but despite what the instructions said there was no username and password request, something I’d like to set when I have time. It reports “Unknown Model” for the Raspberry Pi Model (it’s a Raspberry Pi 4 Model B, 8 GB) but that’s not a problem. System Version:0.20.
I ran through the setup but try as I might could not get it to connect to wifi, the message “Given credentials were not valid” always popped up. SSH works fine so I used the steps in How to configure Wifi and USB wifi dongles from command-line and also Static IP for good measure to fix the wifi. Now all good though the admin page for the wifi settings doesn’t correspond so I’ll leave that alone.
A reminder for myself:
EHZ = Vertical geophone channel (up-down weak motion)
HDF = Infrasound RBOOM RSBOOM channel (air pressure differences)
It’s an impressive piece of kit, I’m surprised by how sensitive it is, hadn’t expected that. Still getting to grips with everything (haven’t tried SWARM, etc, yet) but have also sorts of signatures from washing machines, extractor fans, helicopters, etc. Looking forward to engaging with the community to help identify what some others could be, mostly human generated I suspect.
Finally I used Audacity to generate tones (Audacity → Generate → Tone…) on some small speakers and the frequencies match exactly. When time permits looking forward to seeing just how low my bass speaker can go ![]()