Hello friends,
As seen on Wikipedia/Infrasound pages, maybe someone has already build such a setup for infrasound recordings or has good knowledge about those pipes structures ?
Curious, I’m half-way to craft one. A “8-tubular venting” structure made of 2 octogons, inner and outer parts. it’s made of wood, layered with anti-rain coat for its craddle. (I will post pictures and edit later as it’s already night here…)
- I used 4 boards 200x70mm, chopped about to 80cm, with 45° angles on radial saw for the outer ring.
- 4x14mm sticks of solid iron will make the connection between the 2 parts fixed from below with pieces of woods to weighten the structure.
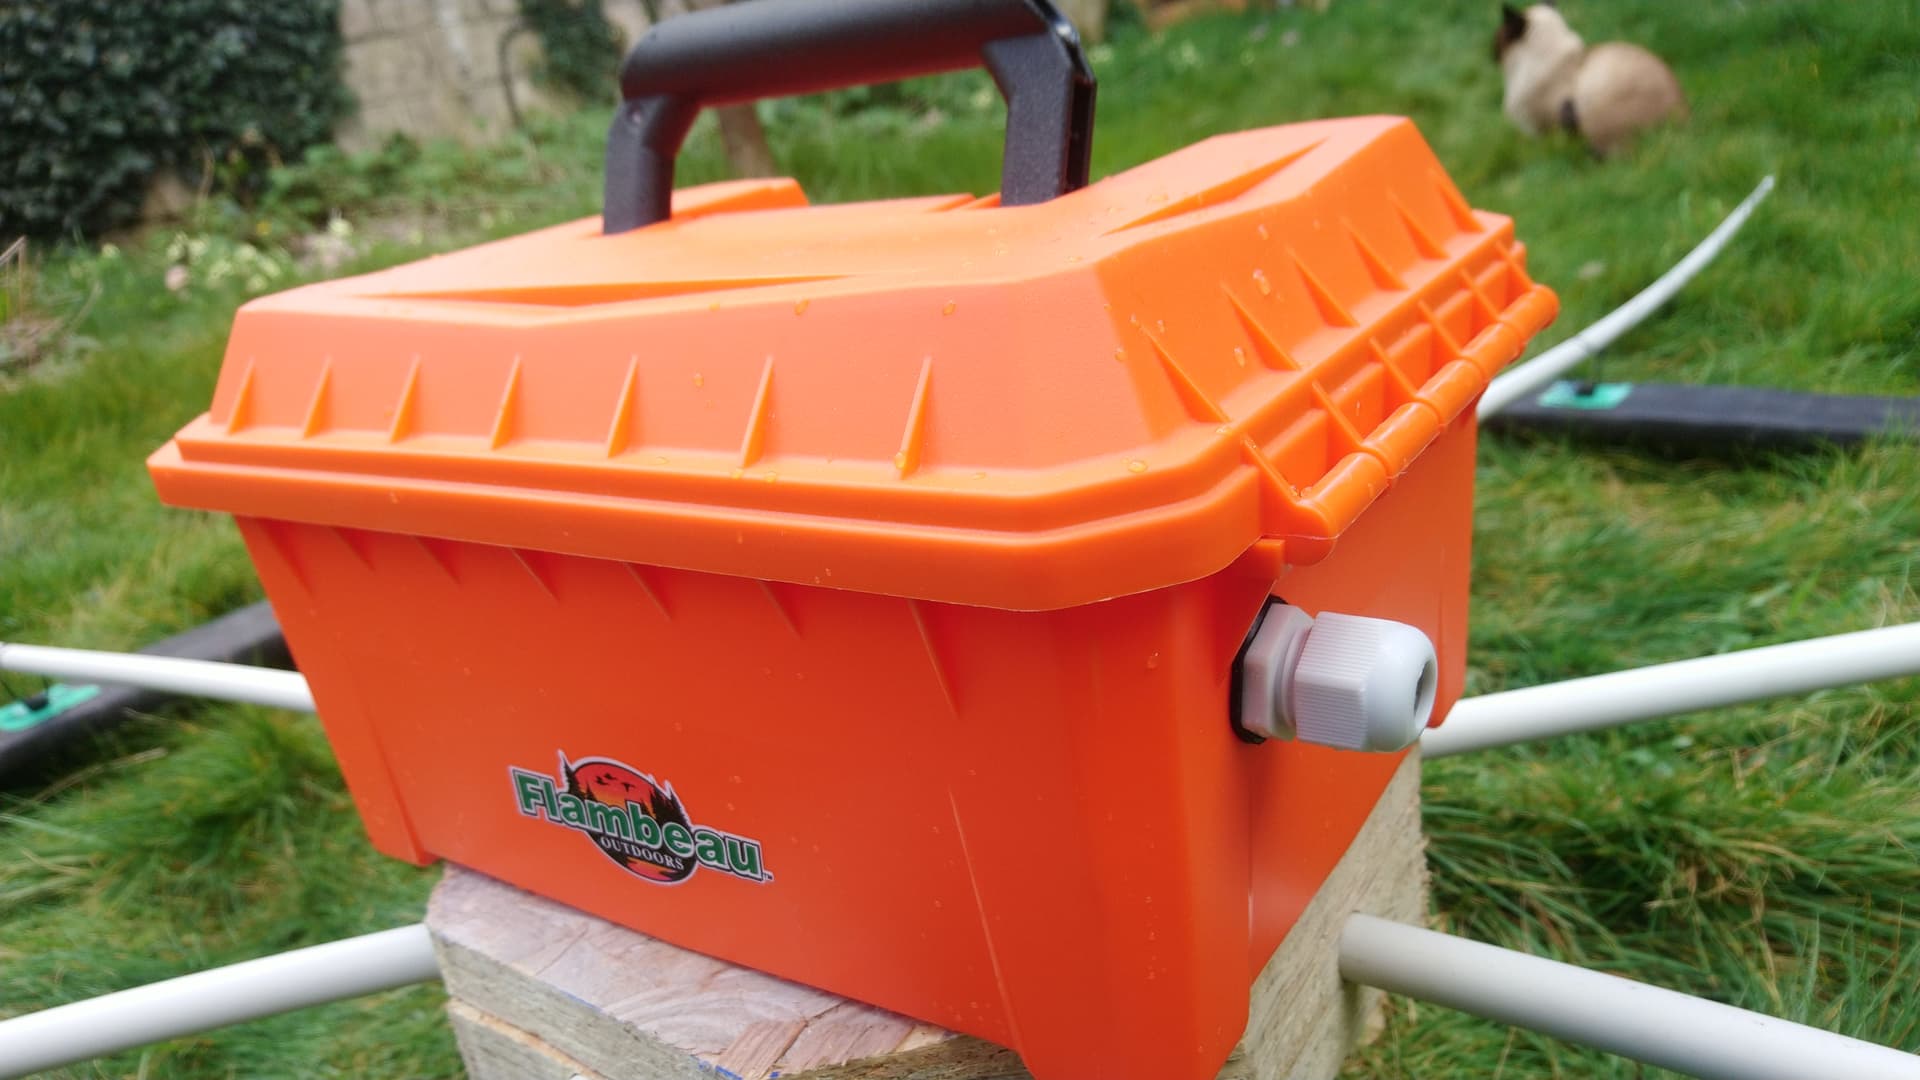
- A marine box, the one I found at the sailing store, from Flambeau, looks more like a tackle box. It is not necessary IP67 so I will secure the provided joint with a second silicon joint. I’ll catch another box later maybe…
- a DHT22 sensor will be added to monitor humidity in the box, just in case. For this purpose I like to use the Luftdaten project sensor. an ESP8266 sending data over wifi to an influxdb server.
- Everything will stand on a horizontal small warehouse roof, 3m above my garden. fixed on some heavy beam of wood.
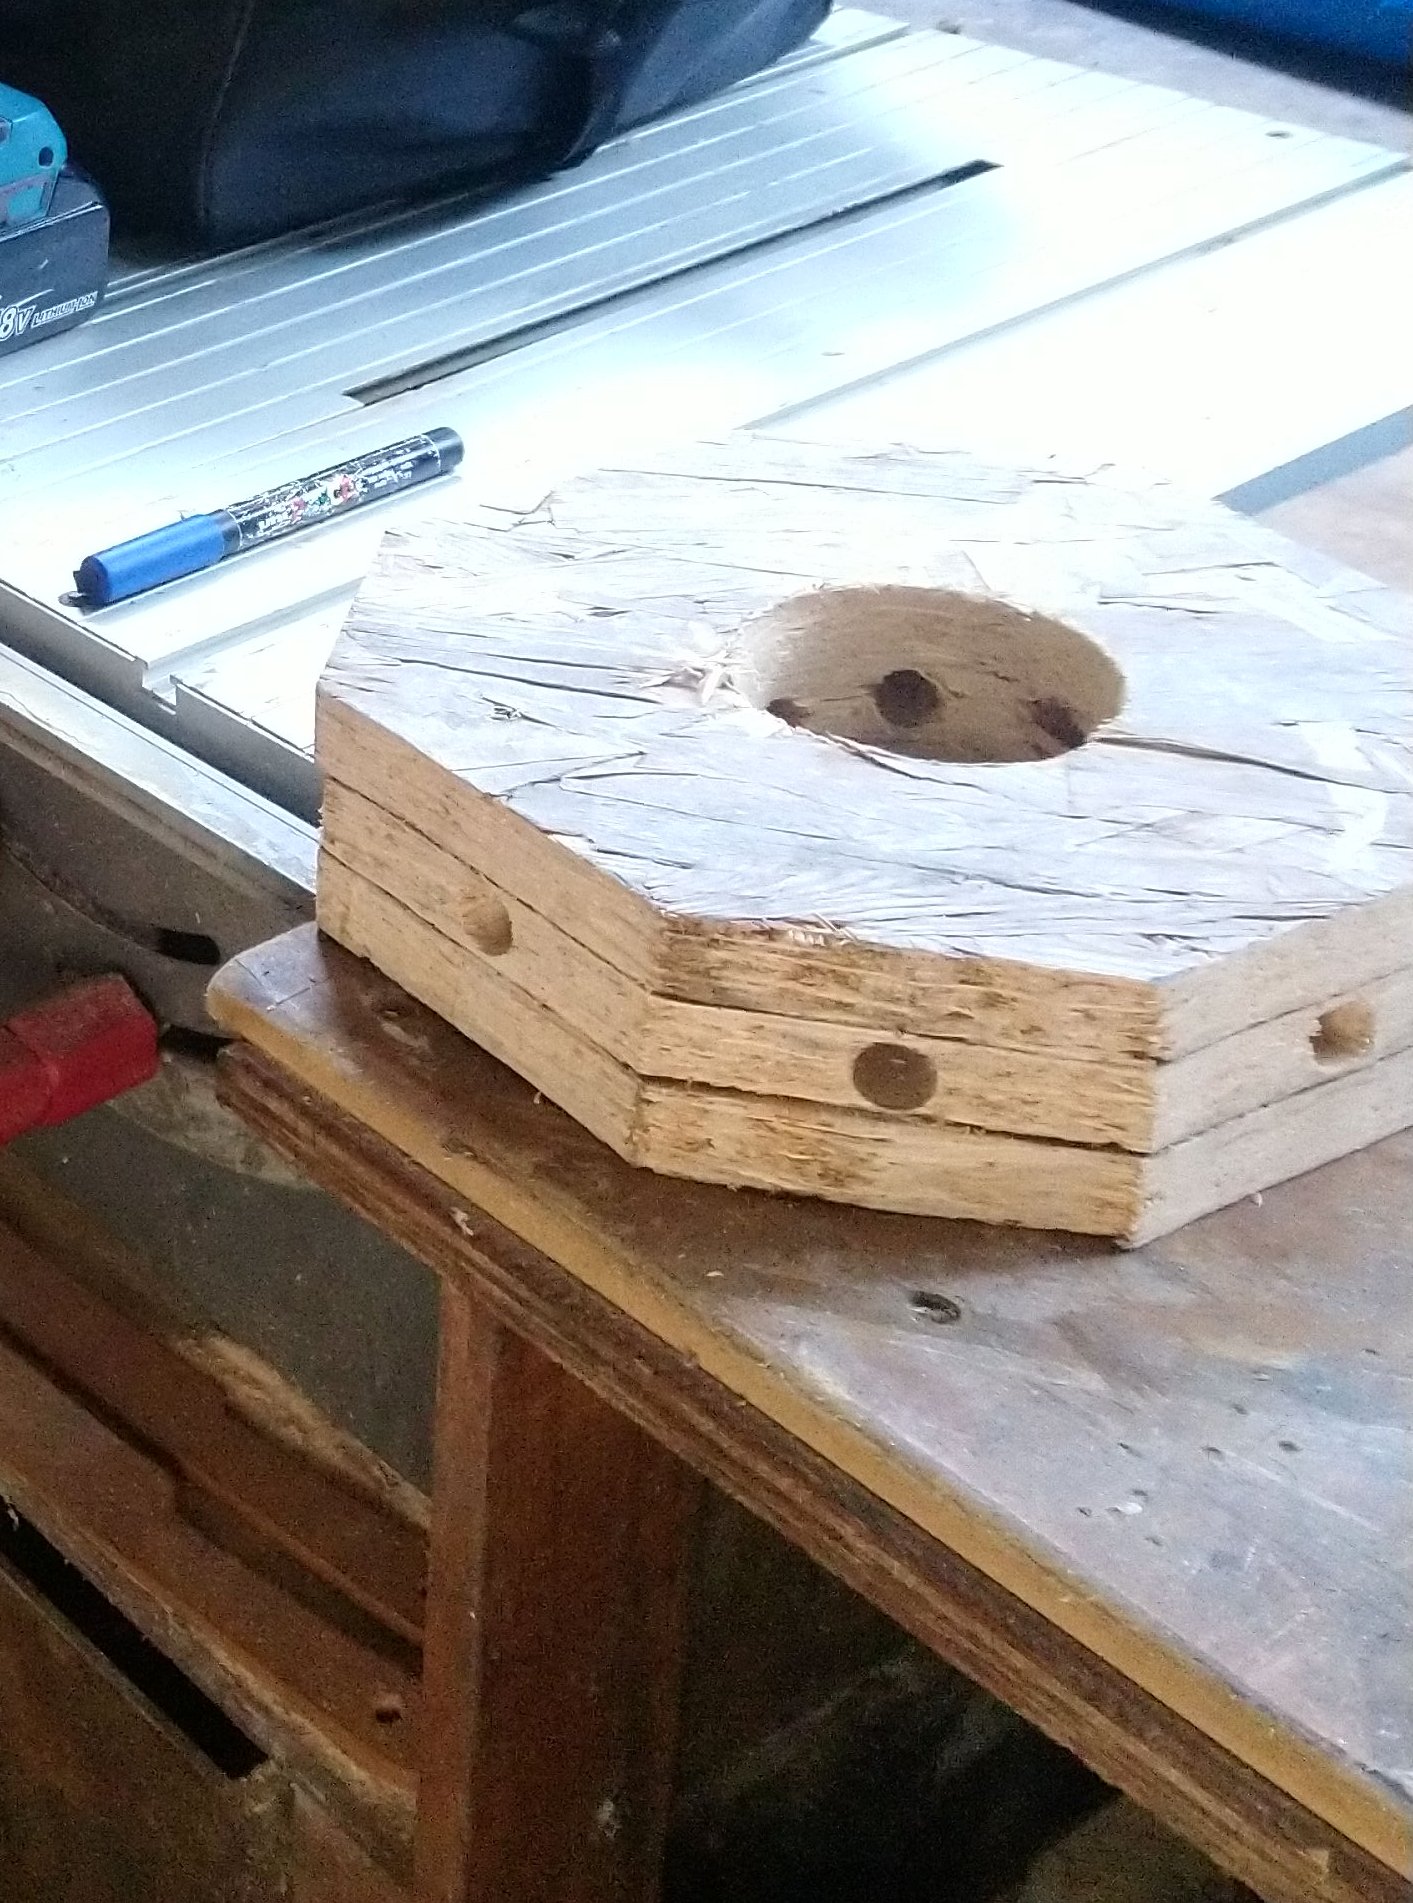
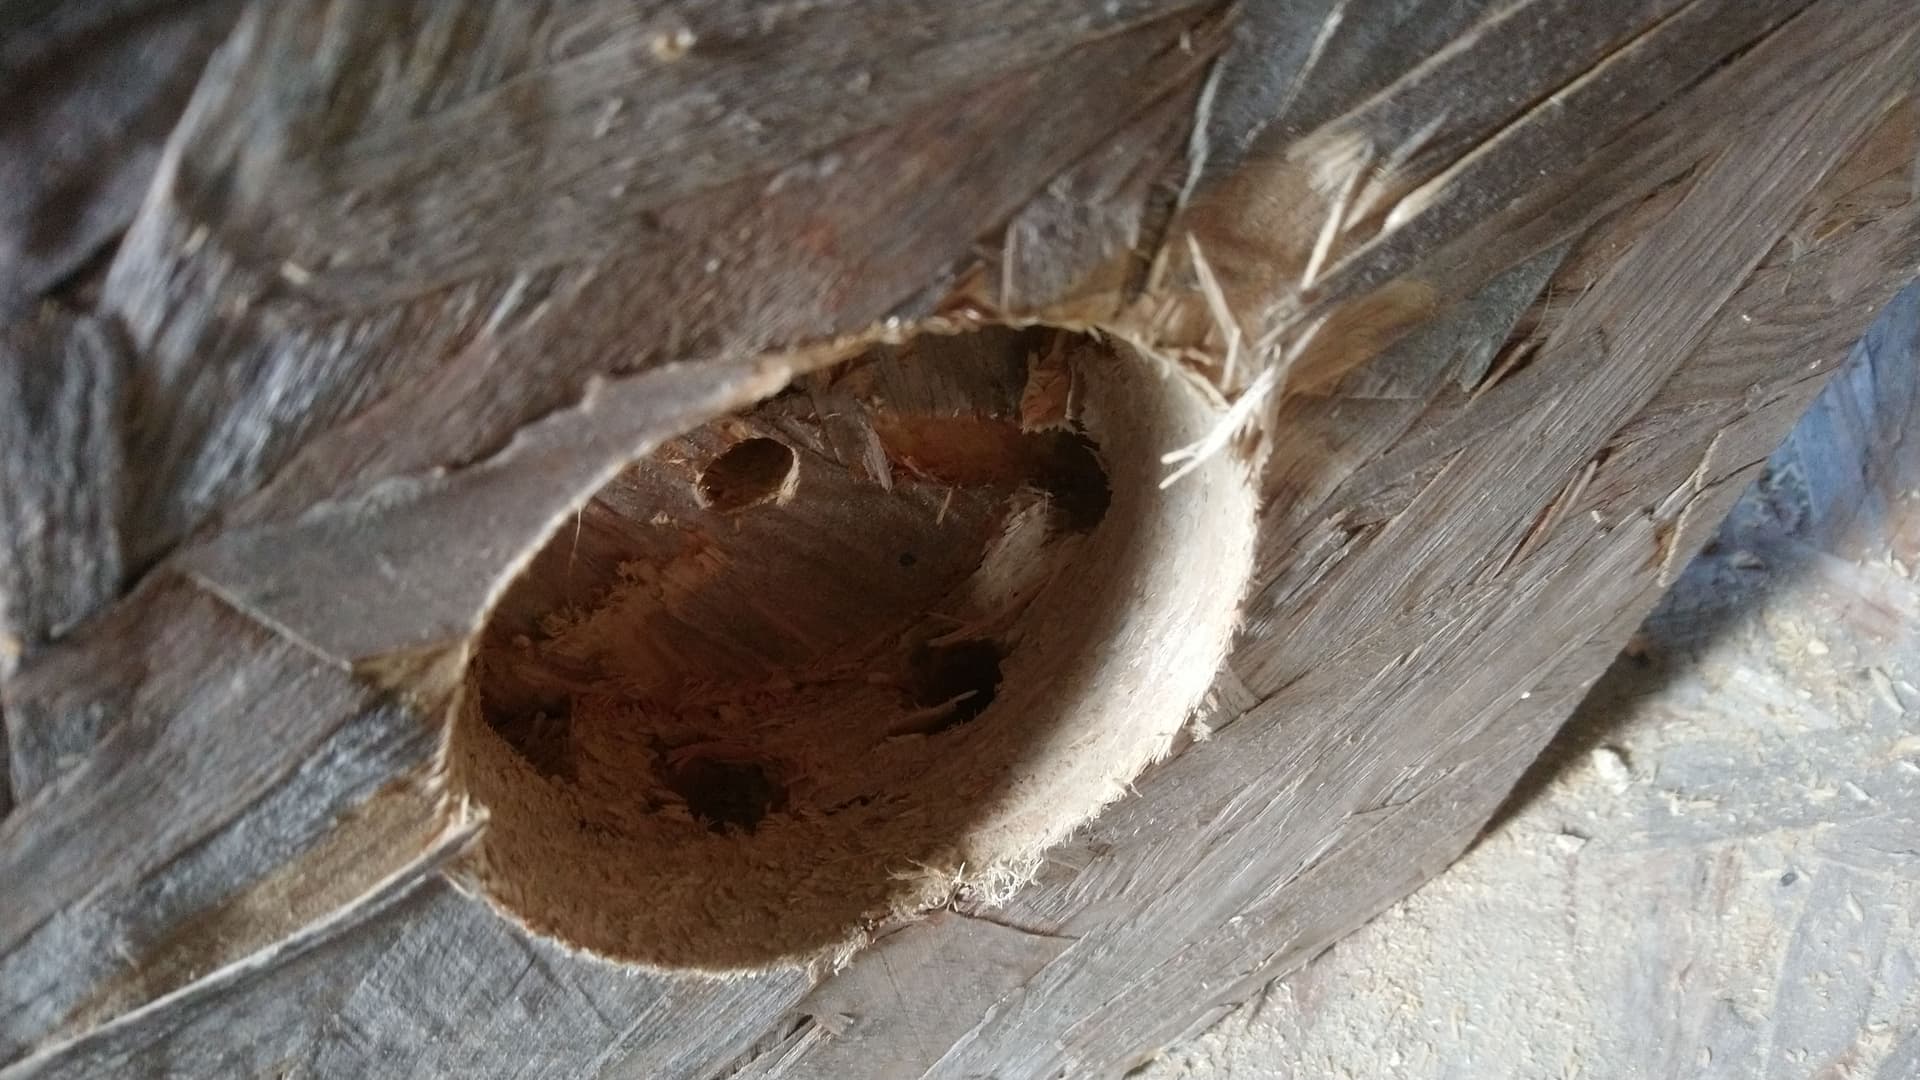
- The design of the inner octogon, “the acoustic chamber” receiving the pipes is a bit my question mark. I simply drilled holes on “version 1”, a central and vertical 82mm main hole for the chamber, and 8x16mm radial holes to route each electrical pipes. I then glue some top & bottom of plywood on it, drill a small hole at the top to fit the pipe of the rPiBoom, silicon join it… I’m curious to see it finished and check if it gives good results.
to be continued…
2 Likes
Hello muedbundy,
To my knowledge (but everyone, correct me if I’m wrong), we don’t have a Shaker who has created such a structure… you may well be the first!
And your setup already looks quite interesting; I’ll eagerly be waiting for your pictures!
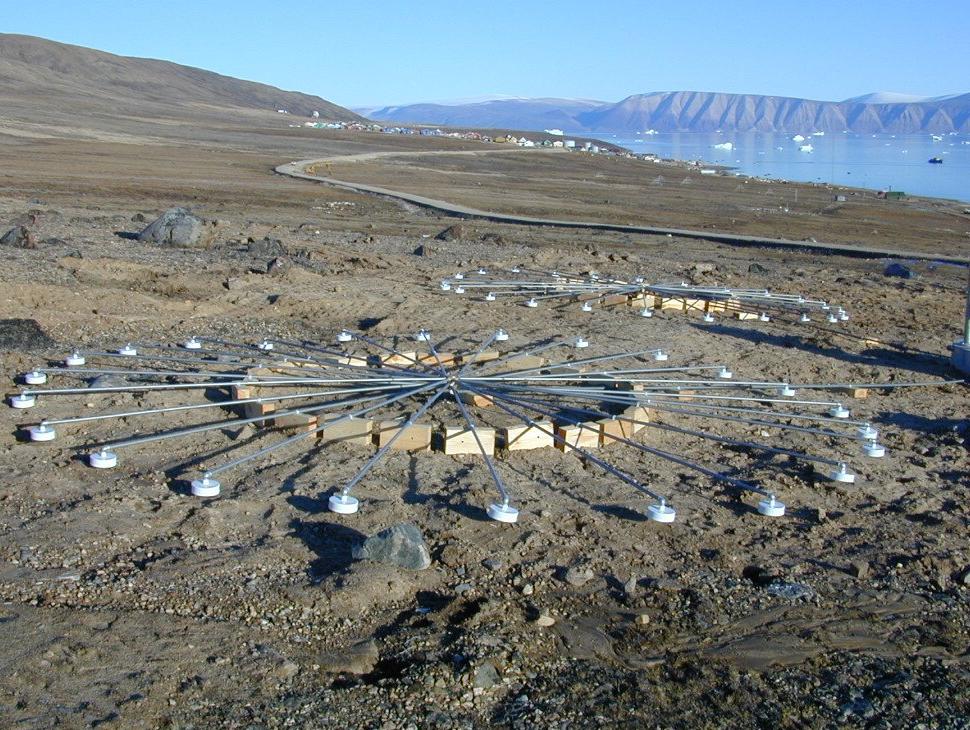
For all readers, this section is our manual reference to these tubular systems: Raspberry Boom (RBOOM/ RS&BOOM) Infrasound Monitors
Hello Stormchaser,
Thank you for the reference to this page. I had forgotten where it was on the website, especially the pictures of that 8 pipes structure. Interresting point concerning the forest. I’m lucky enough to have 4 trees giving a little wood corner to my garden. I will then try to set up this system there instead of going up the roof.
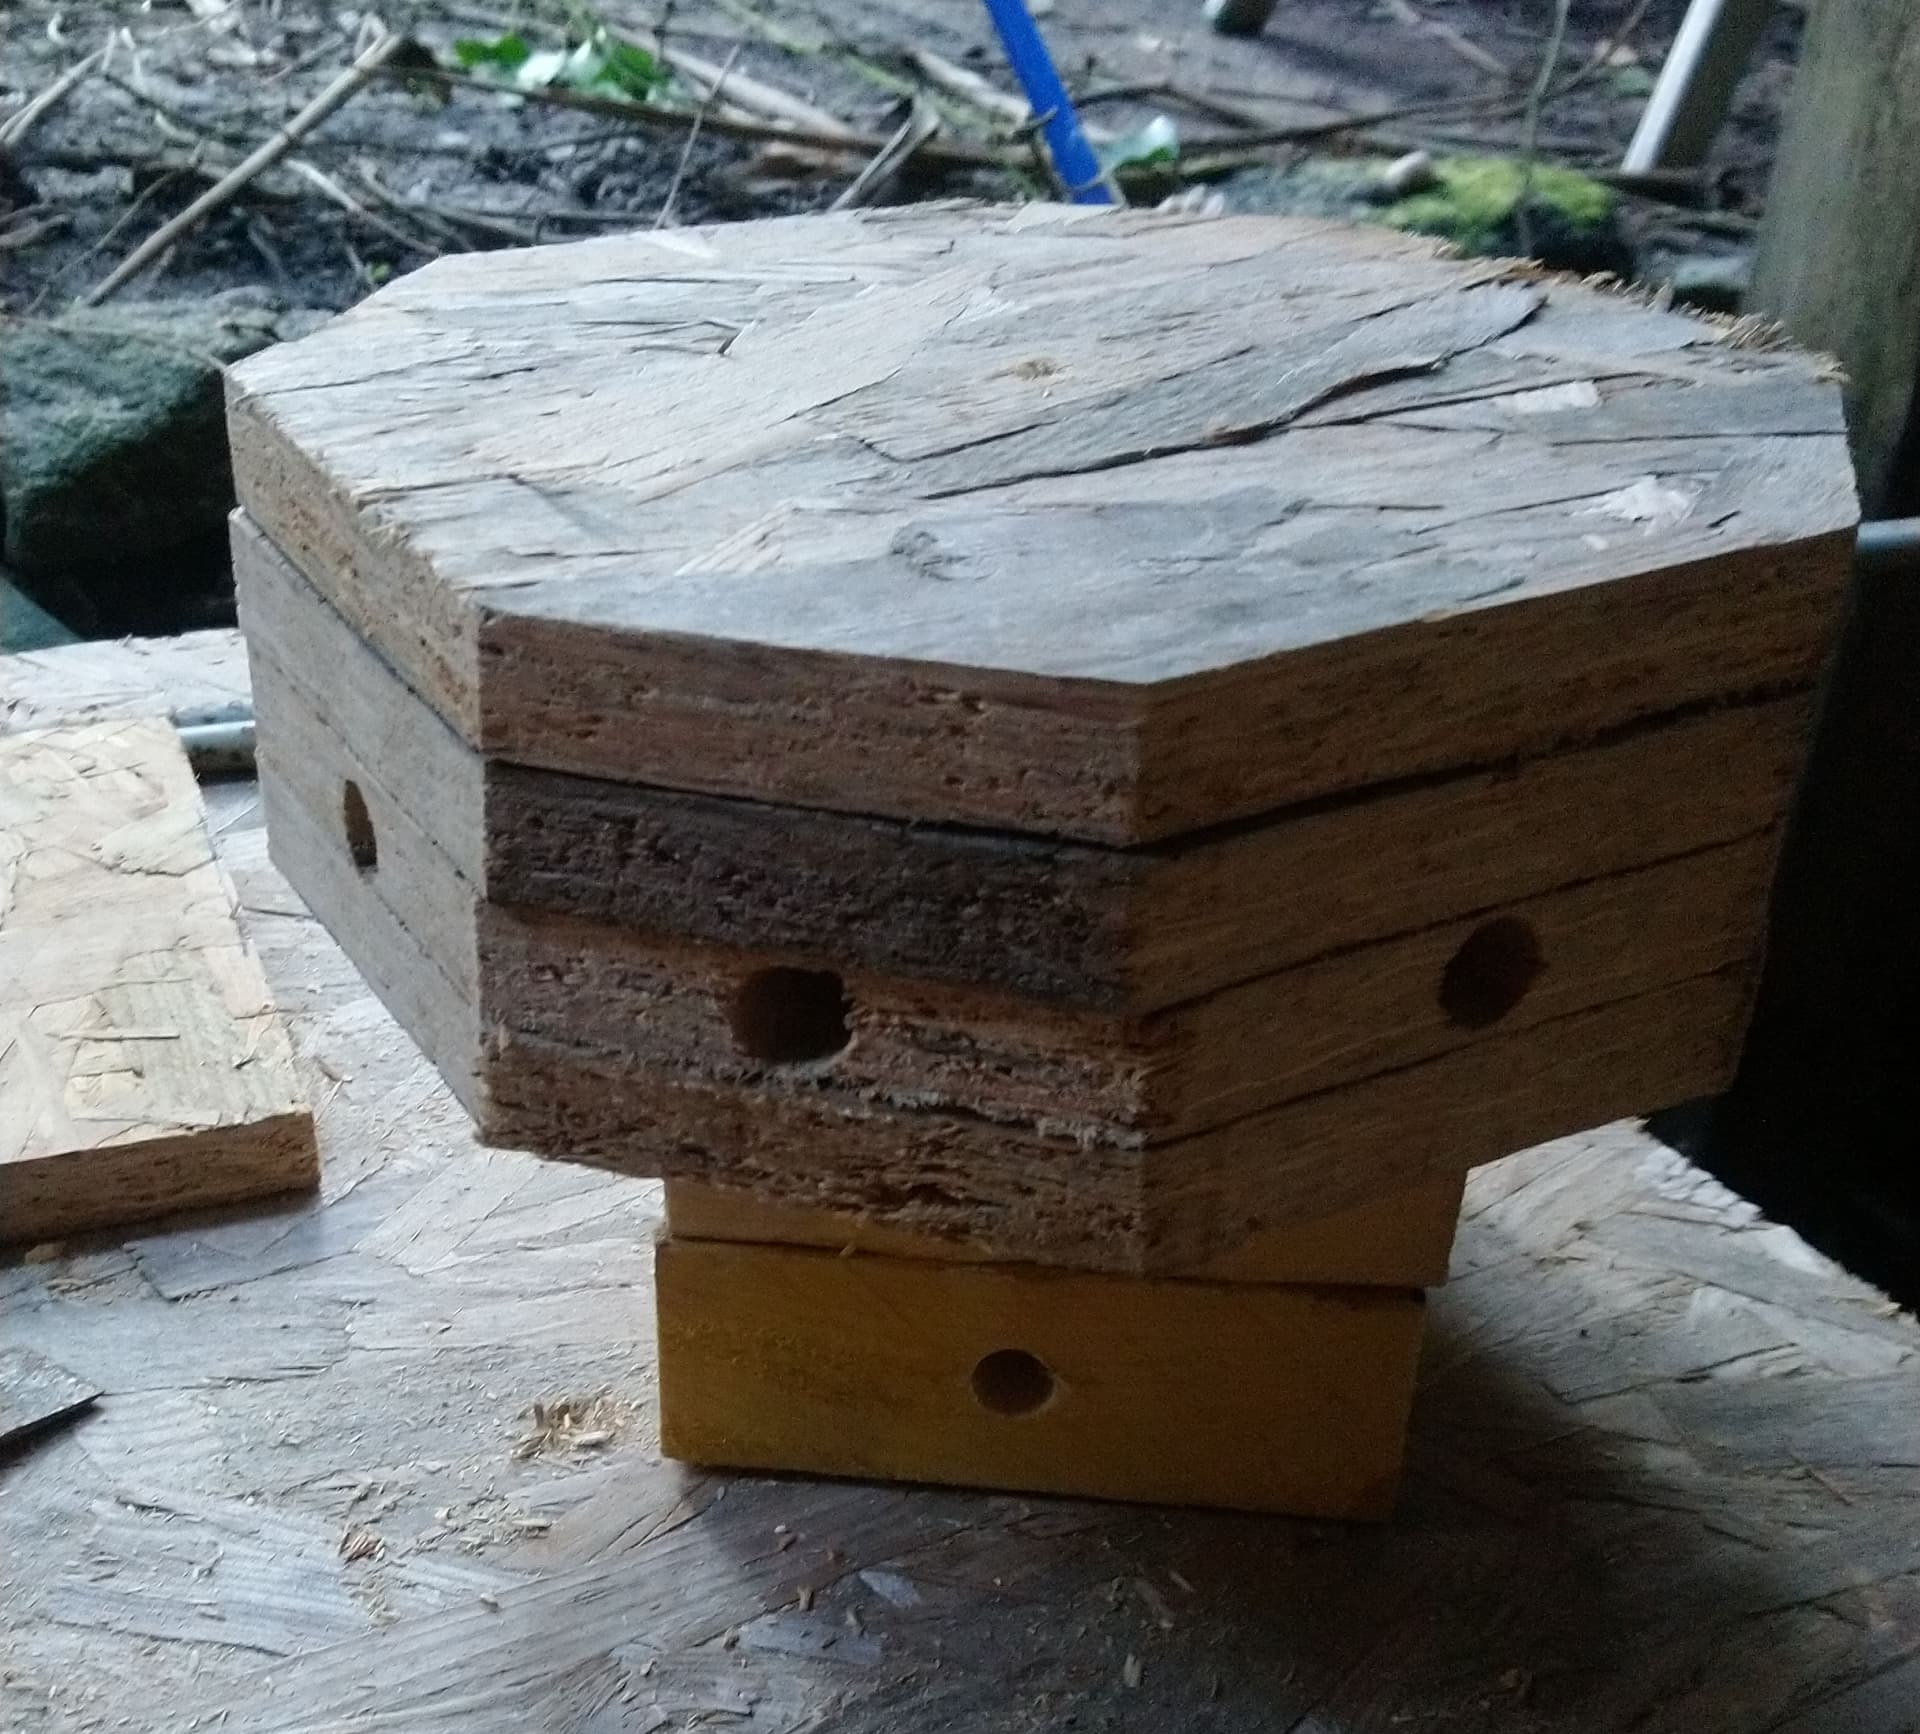
So… I cutted some squares into plywood and roughly beveled their edges to create an octogon.
Once glued, I drilled holes in it.
As I had different sizes of saws for central hole, Grok told me the 82mm was of better dimension. Let’s trust him. Outter holes comes inside, wich is a convenient and fast way to end inside central hole and just stick tubes in them.
A board above will seal the chamber where the tube from RaspiBoom will be routed and sealed.
I will put a last small board above with 2 beleved slits in it, to route slings in it. Those slings will fix the box attached to the structure.
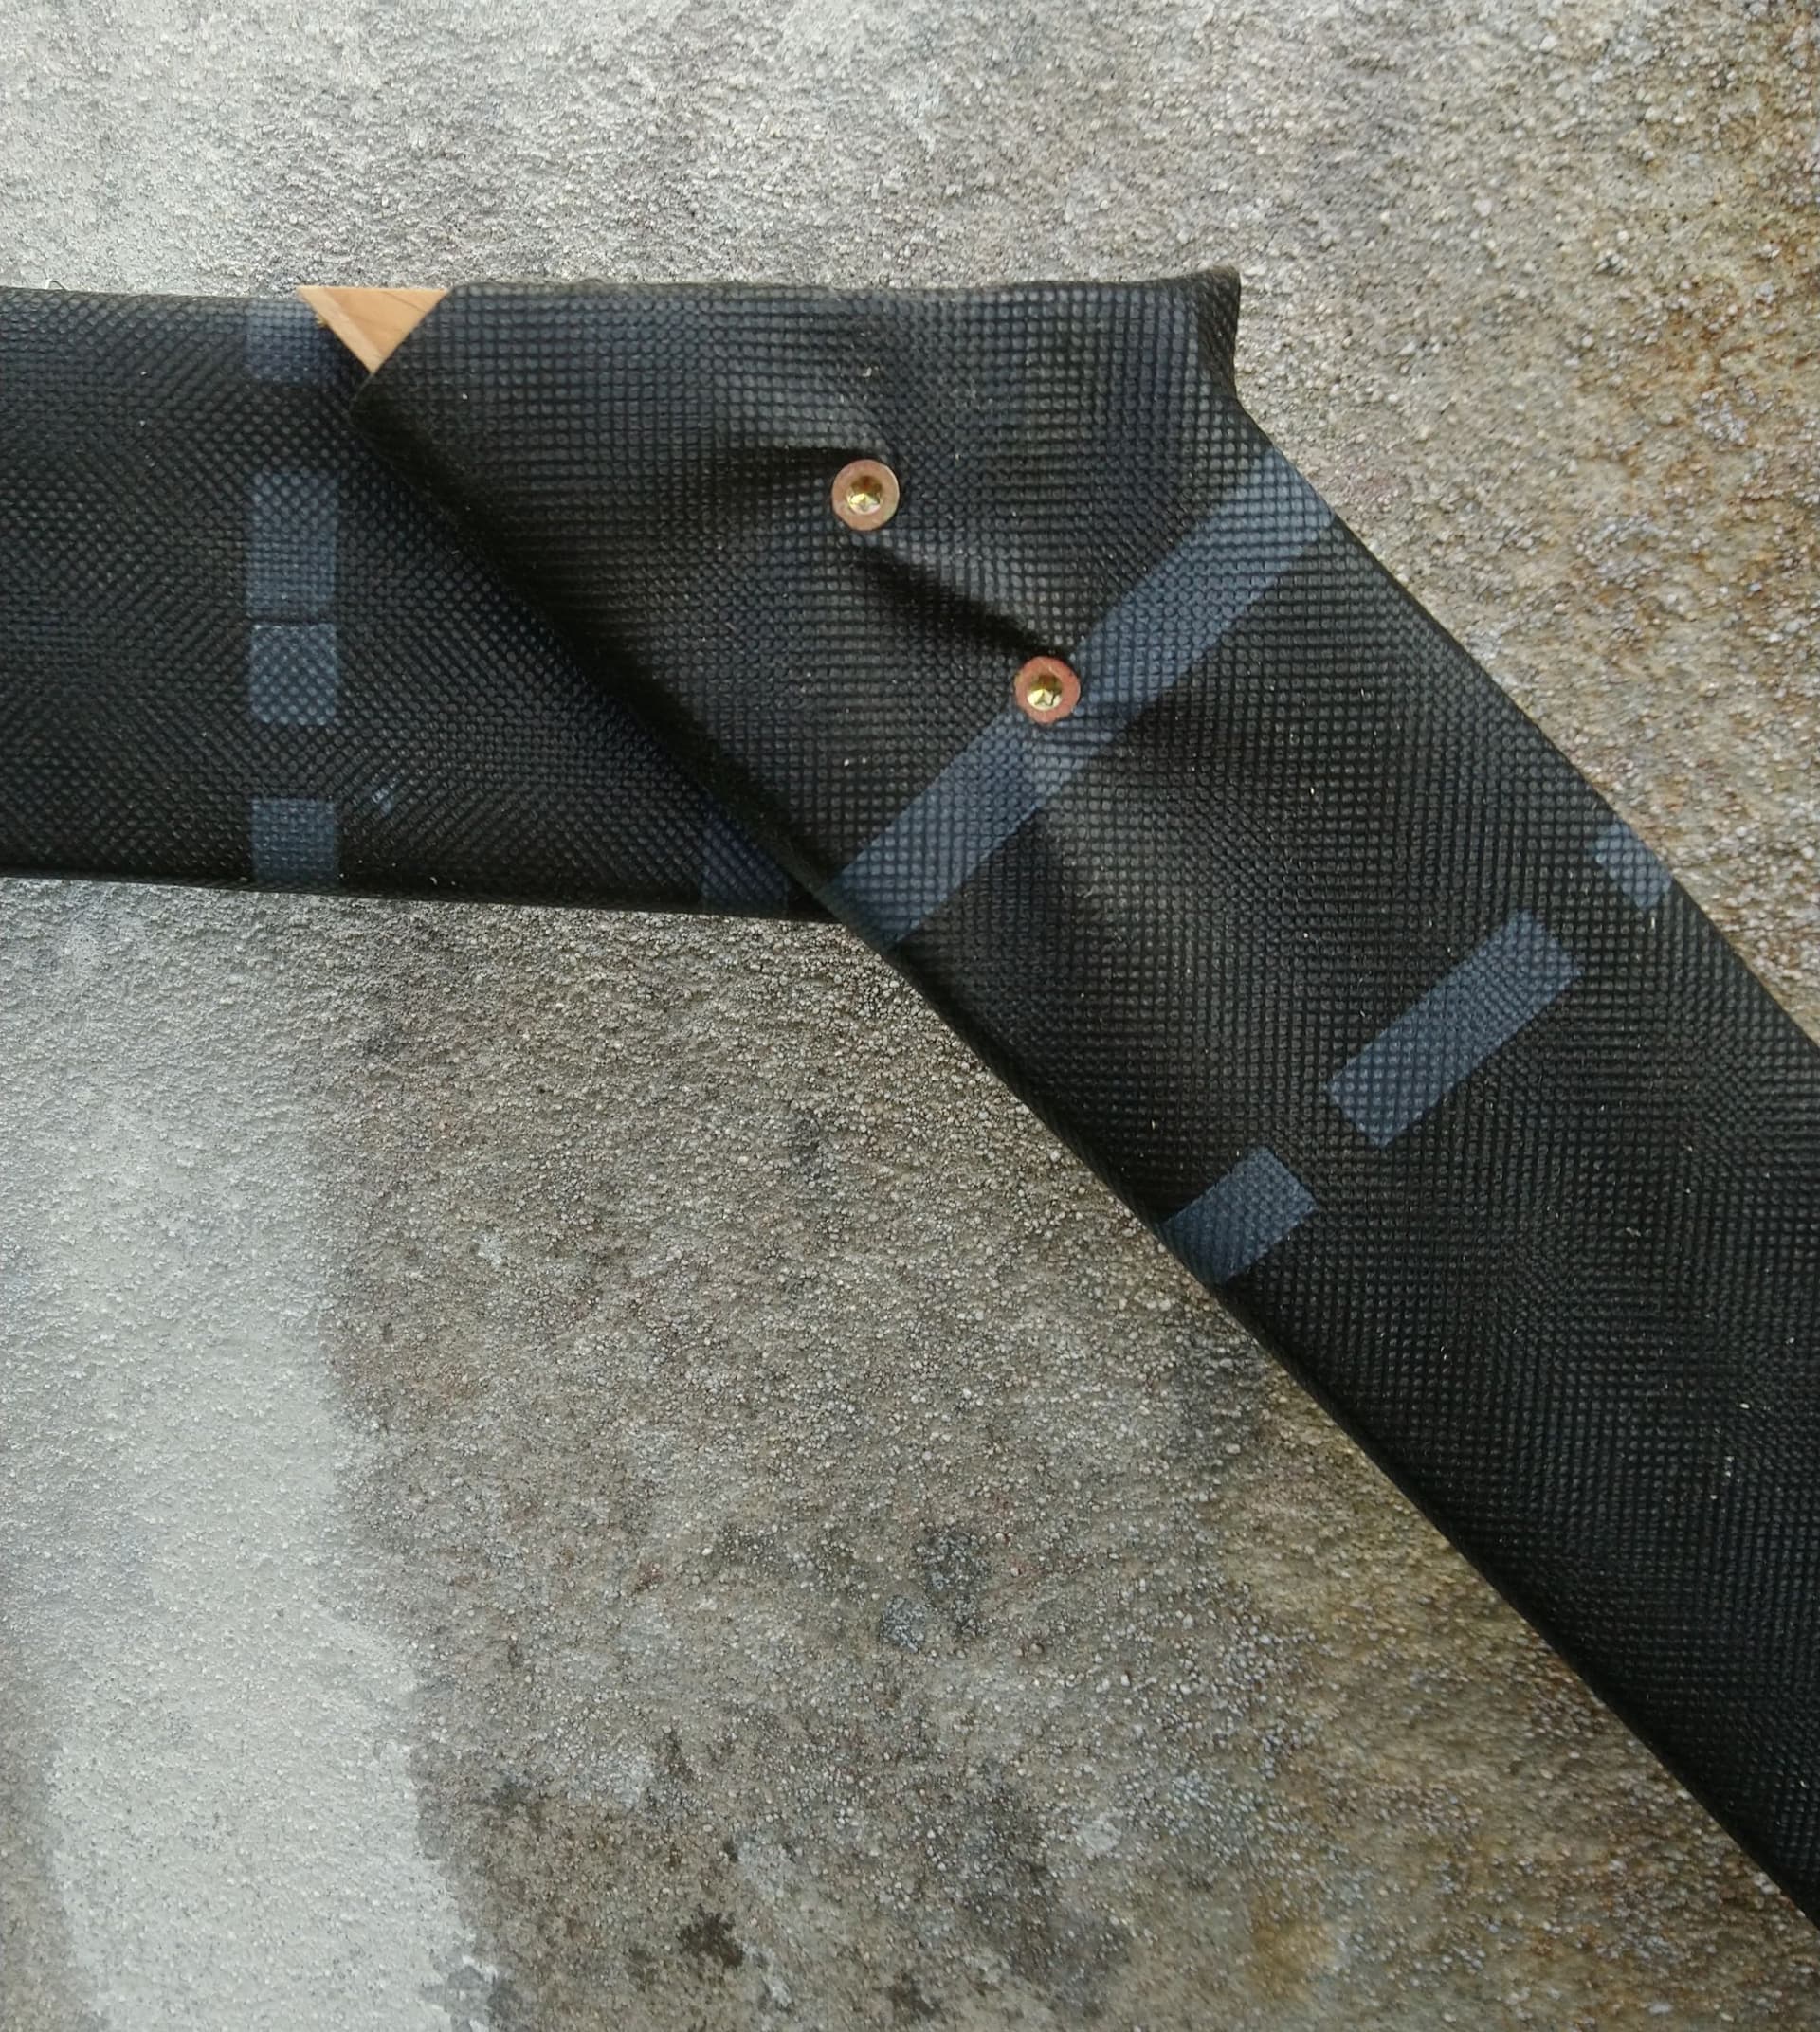
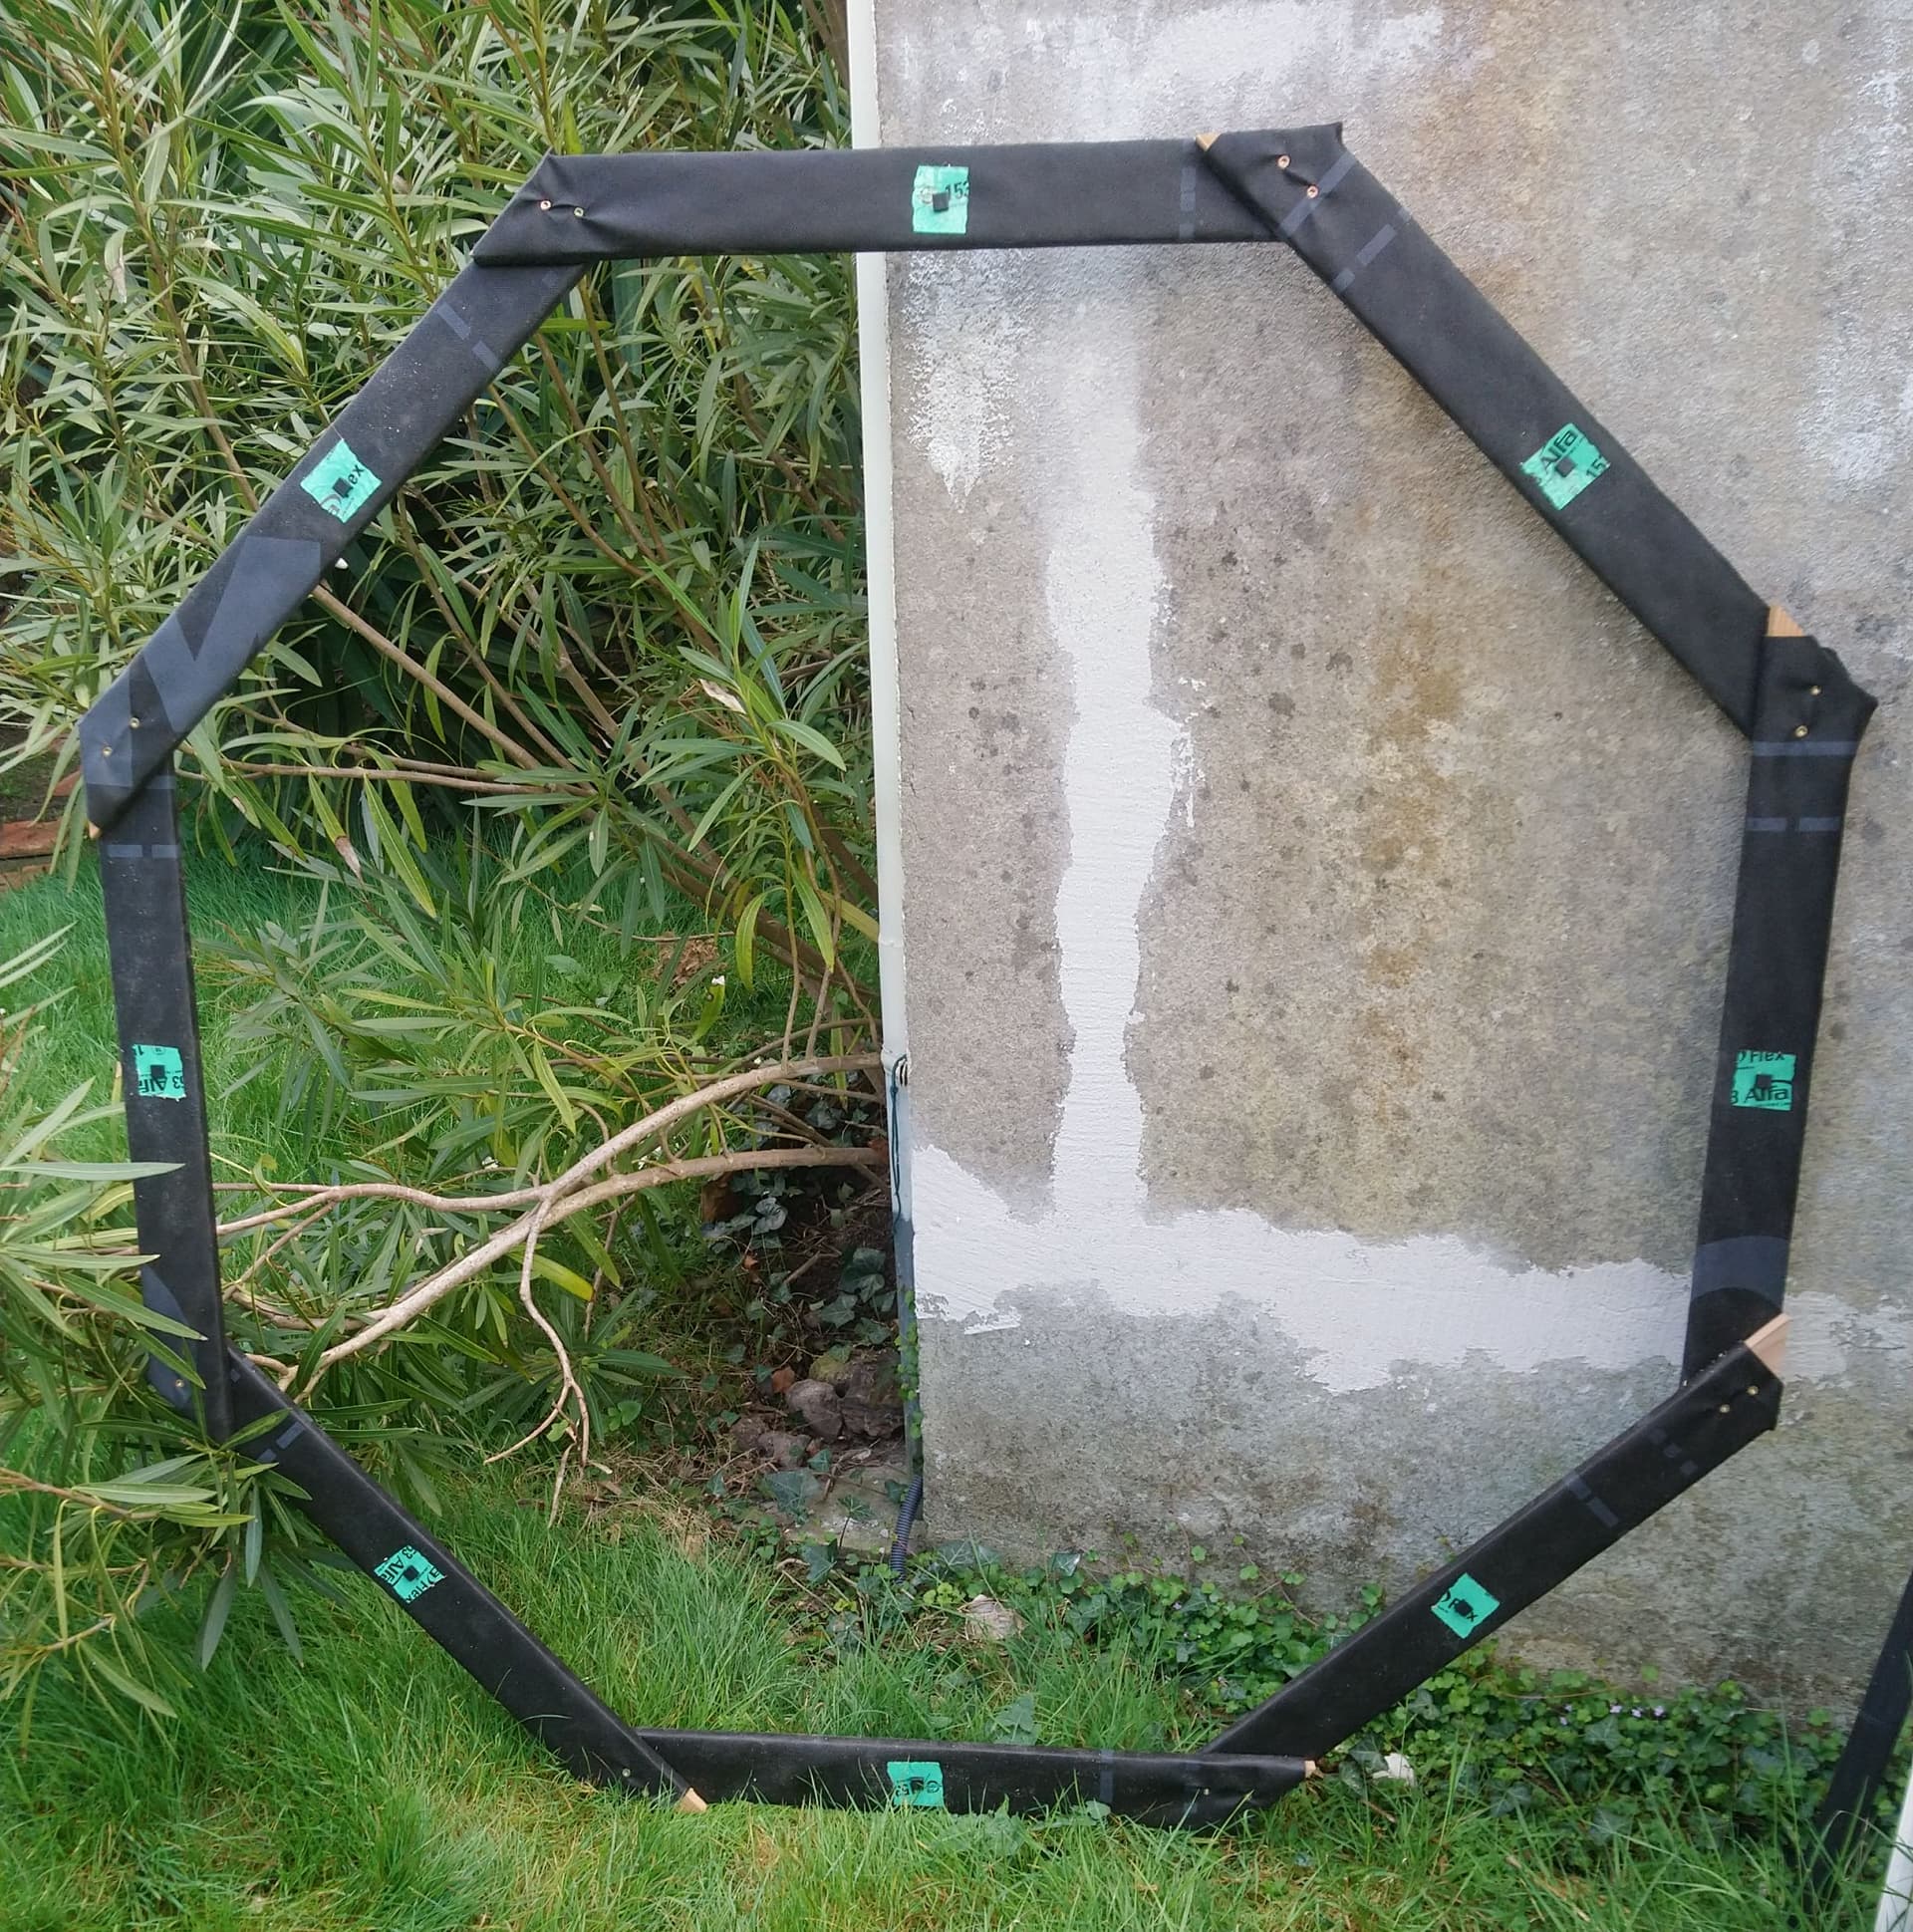
As already written, outter octogon is made of 800x70mm cutted to 45° on radial saw. coated with anti rain material. I’ll put isolation scotch on parts of wood still unprotected.
The assembly gives a nice octogon.
Each board’s center is having a holder and a colson.
Which gives this pre-result. Giving a little height to the central part gives a small angle to pipes, avoiding rain water to flow in.
2 Likes
Hello again muedbundy,
This looks really great!
(and I love the interested kitty)
Let us know what results your testing/final installation will yield. I’m really curious about what else can be detected with this.
I am looking on with curiosity!
Branden