I am in the very first stages of planning this. I have not even ordered a RS1D yet but I have found most of everything I needed for this planning on the website. I noticed that most of the cases were for laser but and was wondering if i could take those laser cut pieces and redesign them to be used with a 3d printed. I did not want to have to just print a bunch of flat pieces and hook them together like the laser version so I used them as a templet to design a new 3d printed enclosure. I will be putting in heat set inserts into place for all the mounting points. I have not done that before so that will be a new experience. I will fill you in on my progress as I go. I just wanted to post this today in hopes of getting feedback on the design before I print it. If you have any suggestions please let me know.


This looks like a great DIY project artteacher!
I’m sure that many will find your steps both educational and inspirational, so please yes, keep us posted on your progress.
And, for anyone who hasn’t seen it yet, on our DIY Tutorial page (DIY-Tutorials - Raspberry Shake), we have lots of material if you want to follow in artteacher’s steps and 3D-print your own Shake enclosure!
Raspberry shake monitor seismic
Levkusje, Croatia
Seismograph meter
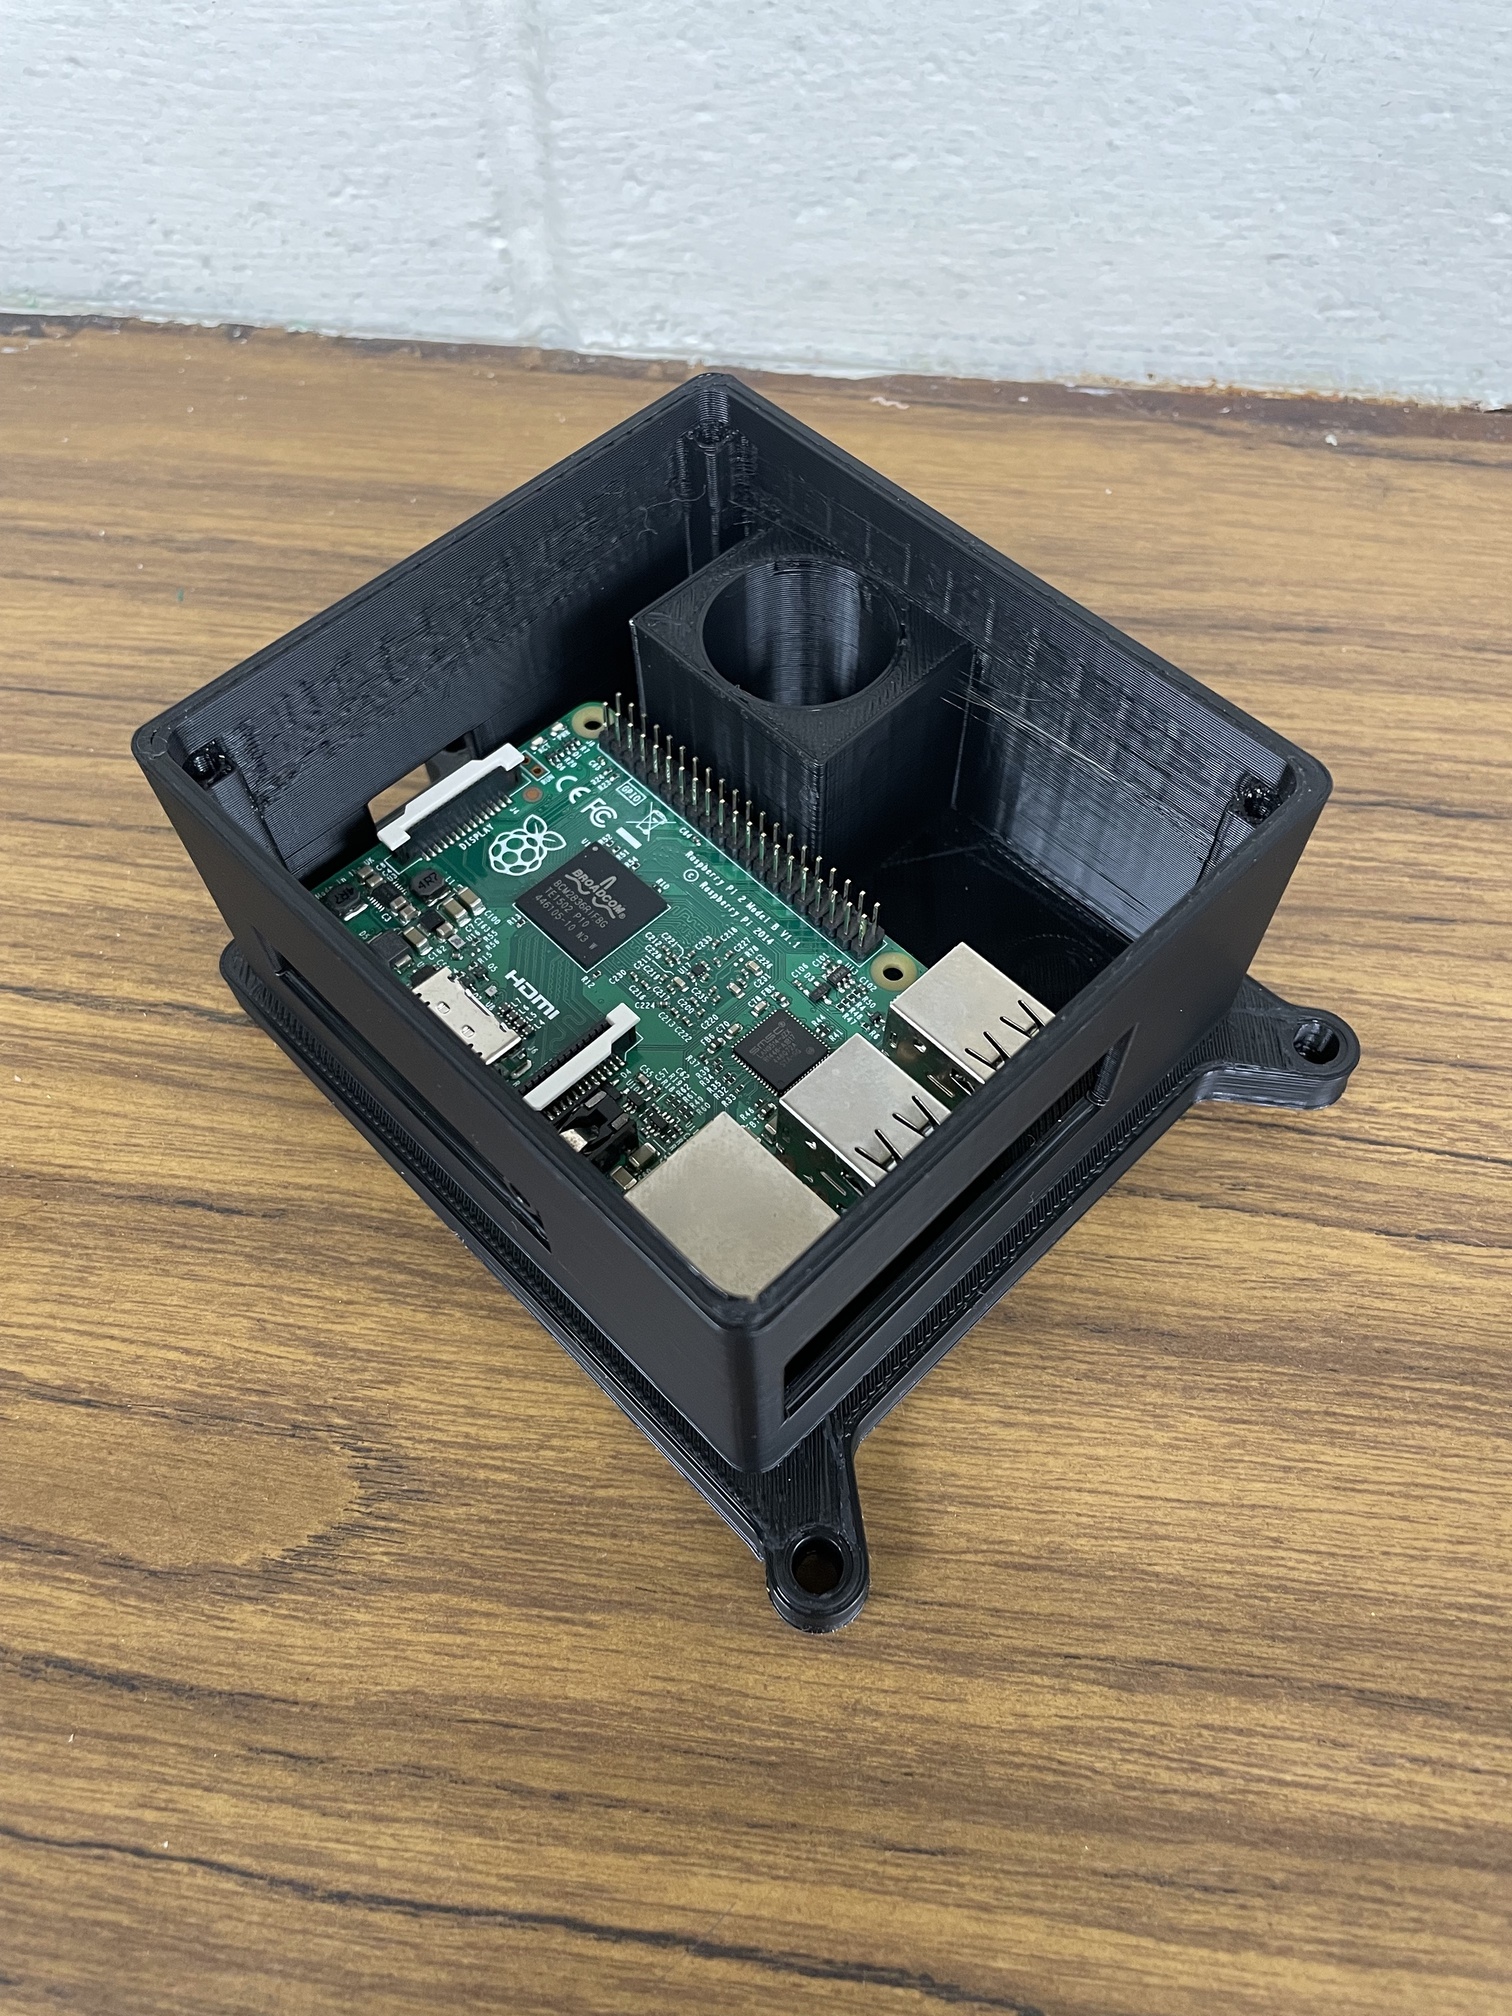
I have it printed, everything seems to fit but I do not have the brass inserts. So I cannot tell for sure if the mounting points are perfectly aligned. In theory everything should line up, I used the provided base for all points. They should be coming in the mail on Wednesday. This was printed on my fasted setting so the quality is not great but I wanted to make sure everything fit.


This looks really good! Thank you for continuing to share your progress with us artteacher!
The only thing that needs to be checked is ventilation, I would say, as the Shake could get hot when walled in that way.
However, this test needs to be done directly when you have all components available and then proceed with some redesign, if needed. Great work!
This looks great. Thank you for sharing!
Thank you for the feedback. My SD card and my threaded inserts came in today so I am going to make sure it will all go together. Then I will print more of a final version. I will also be printing a top with the logo cut out to add air flow. Hopefully I will be able to post an update tomorrow.
I finally received my SD card I have even uploaded the operating system onto it. I also received the brass inserts. I had never used them before so I found two issues. The first being the work pretty well for the outside leveling feet. The have pretty good hold. I also found out the little ones are very hard to get in straight.
With those two issues I am going to go back to the drawing board a little bit. I was really tying to keep the bottom tray free of any holes but I think I will have to have holes. I will just put holes through with spaces for hex nuts on the bottom to make assembly easier. I think I could have kept with the brass inserts but I don’t have access to 13mm standoffs and that is not something I will use often. So I am just using 2.5mm screws and 3D printed spacers.
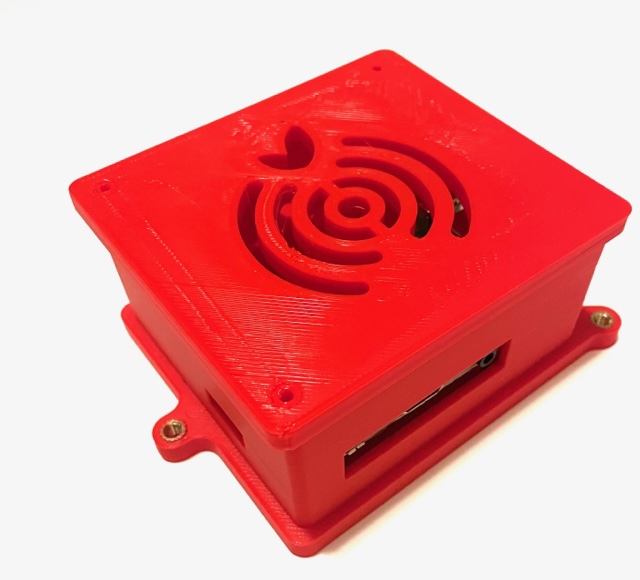
I also have included a lid redesign to allow for more airflow. I used the raspberry shake logo with a little tweaking to make a workable grill.
I am busy most of this weekend but if I get some free time I am going to edit my design to reflect those changes
Here is where I am at right now. Slowly making progress. Any other suggestions?

I have created many 3d printing projects that required installing threaded inserts. I use a bench drill press. Take a 3 or 4 inch bolt with the proper thread for the insert. Cut the head off the bolt and put the threaded bolt in the chuck. Screw the brass insert into the bolt. Heat the brass insert with a soldering iron or a heat gun. Then lower the chuck to press the insert into the printed piece. Use a spray bottle of water to cool the insert. Then unscrew the printed piece from the bolt.
Using the drill press insures that the insert goes into the printed piece exactly vertical.
If you are the USA, Harbor Freight sales a cheap bench drill press for about $80. A vice to hold the printed piece can be had for about $20. If you are going to be using brass inserts frequently the drill press is a good investment.
Make sure you practice first. It takes some experience to get the heat right and also determining the correct size for the printed hole.
Good luck.
Thanks for the heads up using the drill press. I will have to look into that. I do have a small one I could use.
Build update
I have done some tweaking. I think this may be my last major update until I have some funds to order the board and sensor. I redid the bottom mounting holes. Instead of using brass inserts I made it so it would just holds nuts so there was a little more room for error. I also built the standoffs into my design to hold the pi up. You can’t see them in the pictures but they work great. I may make them a little bit thicker at the bottom to be less fragile but they work well. I tweaked the top and got the top brass insets in. Not sure how well I like that yet but I didn’t have any better ideas. For some reason it twisted when I tightened the screws down. Those are my main issues that are still bugging me. Excuse the mess up in the top lid. One on the first print layers let go and got incorporated into the shake logo.


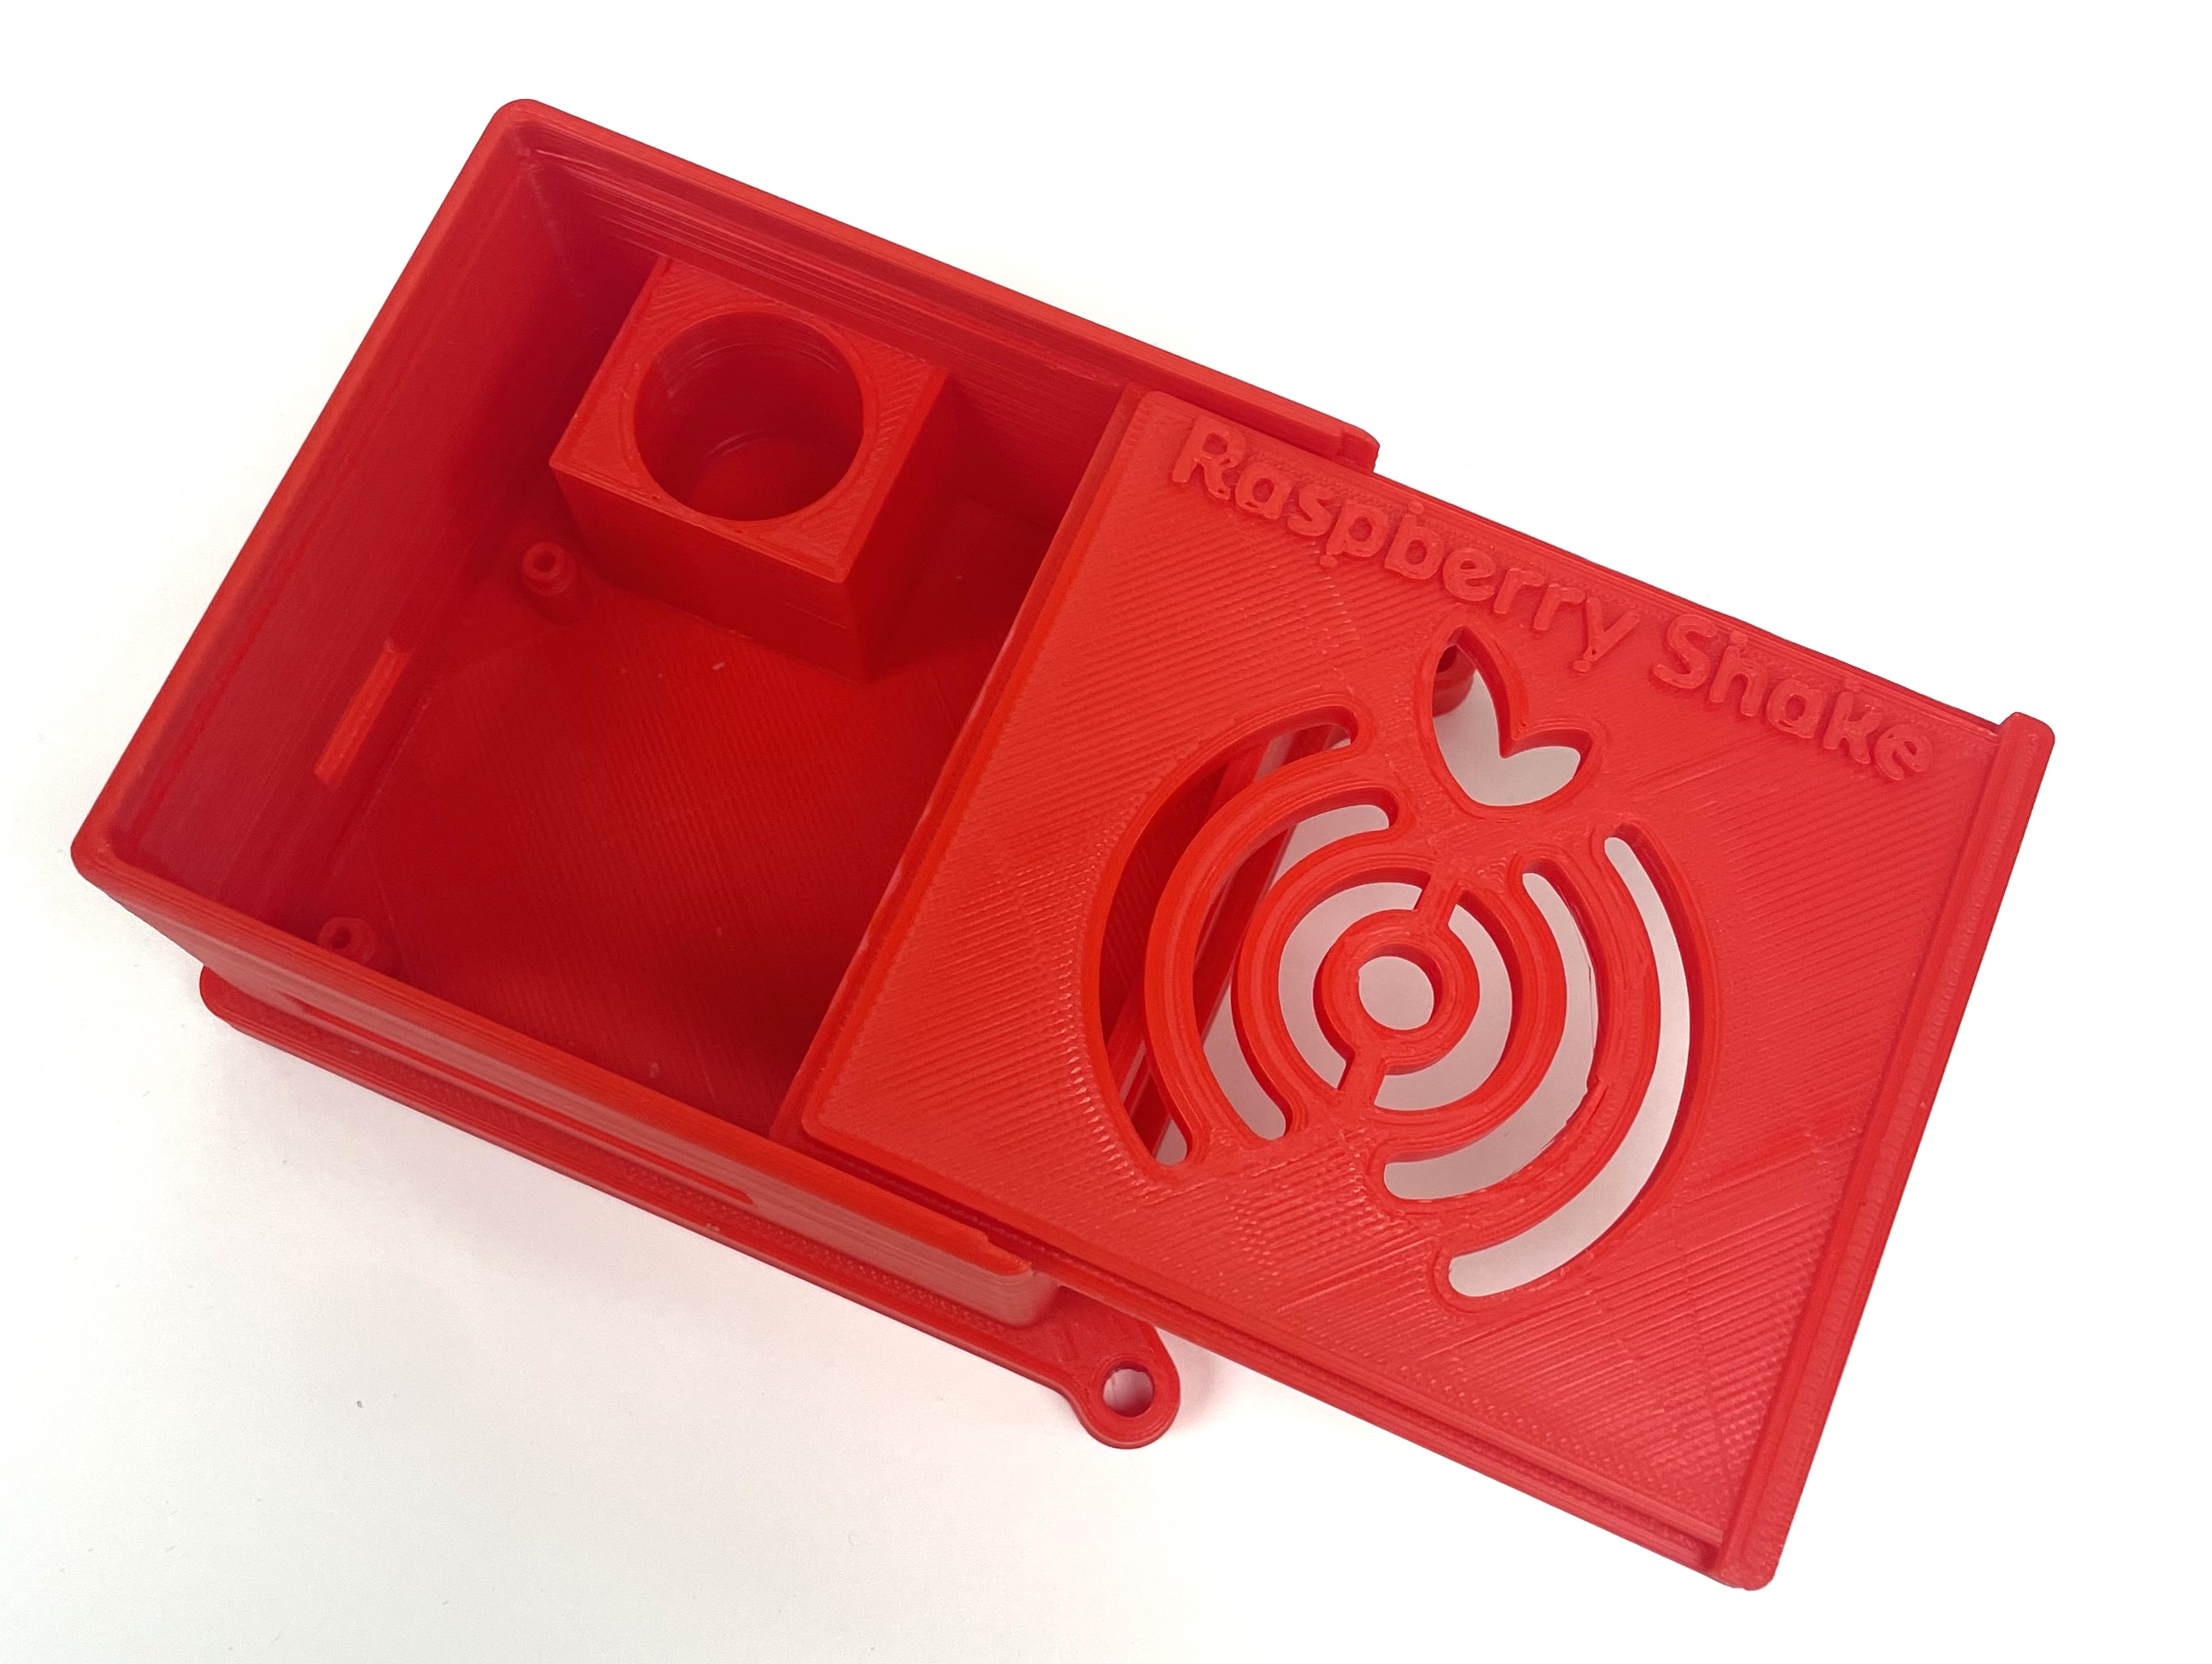
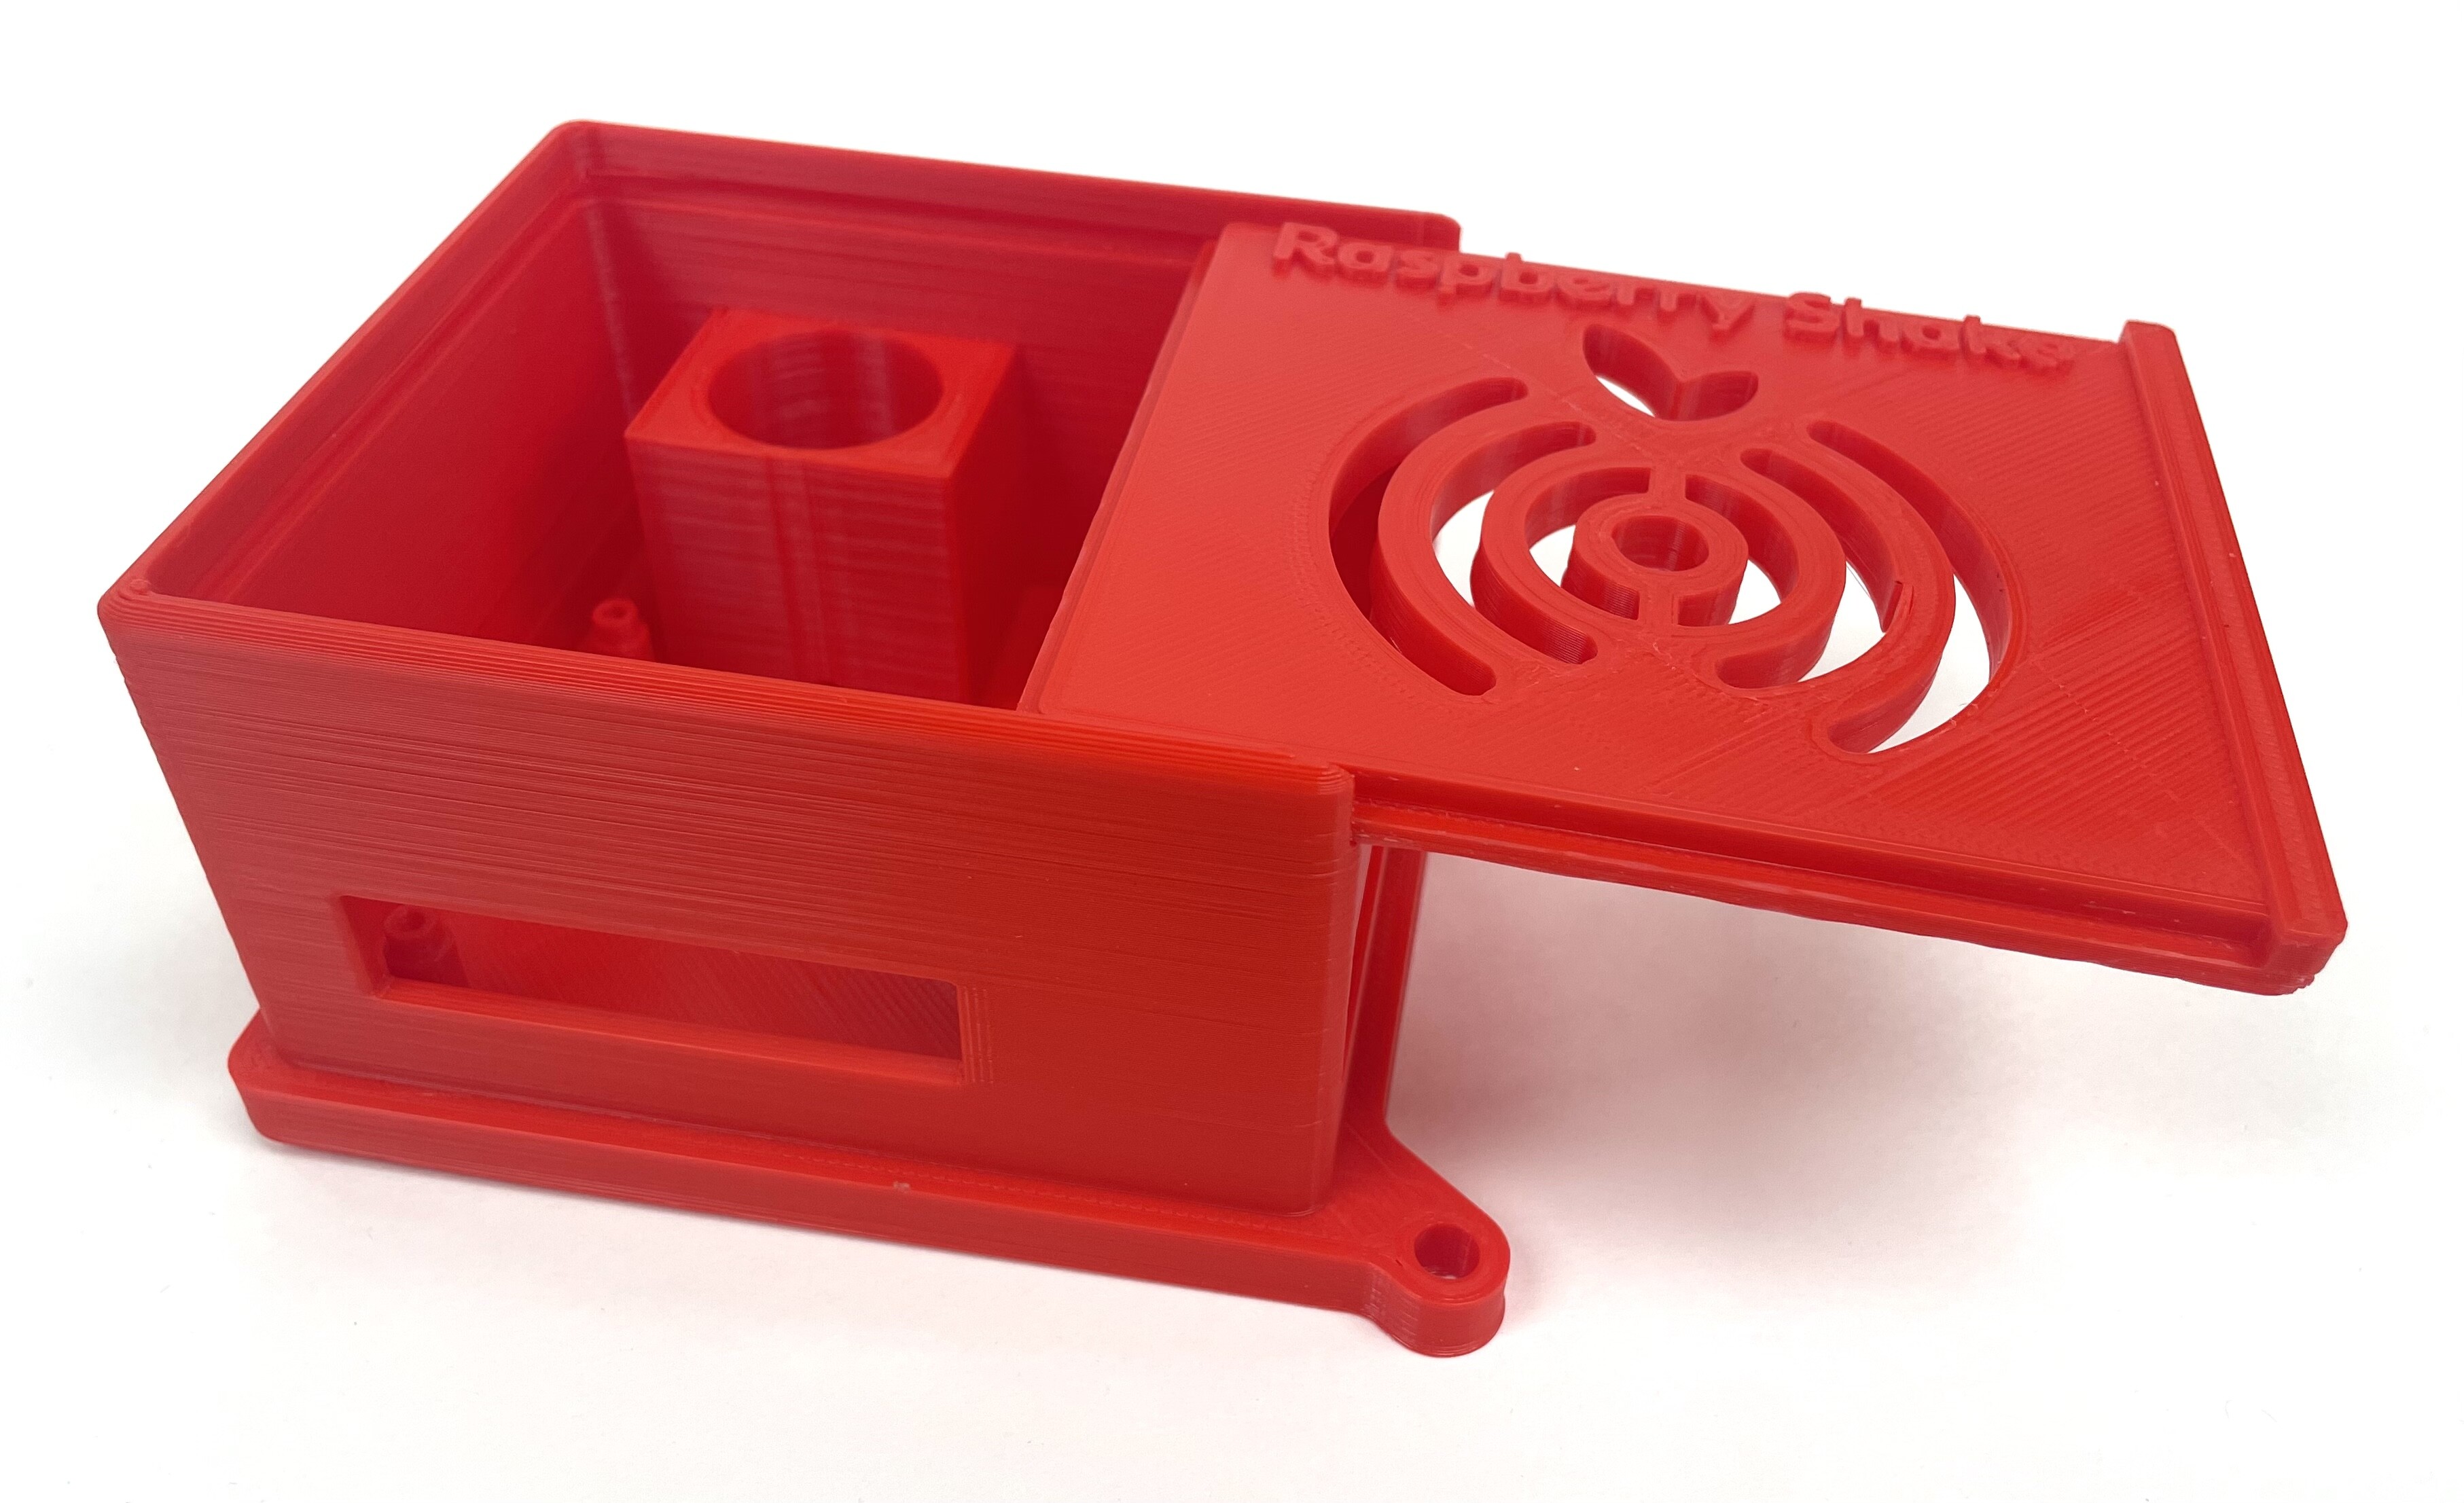
I lied, I decided i really did not like how it was working so I did some tweaking and made a different lid. This time it will just slide into the base instead of being screwed on top. Here is a screenshot. It is printing, I may get a picture loaded tonight.

Finished…. I like this design so much better. I have supports for the raspberry shake. They are a little thicker so hopefully they don’t break off. I changed the lid so now it just slides into place. I was even able to add the logo to the top. It was not perfect but looks good. I also got my first donation to my gofundme so I am halfway to ordering my first shake.

This new sliding cover looks really cool!
Thank you for keeping all the community updated with your project!
I have my old trusty raspberry pi 2 loaded up and everything fits like. Glove now onto hoping I made the hole the correct size for the geophone.


I am ordering my shake in the morning! Will post more updates when it comes in.
It came in today. Now to check to make sure everything fits. I am also waiting for my power supply to come in.


Great design @artteacher. Would you be willing to share any source files for your enclosure design? I’m interesting in something like this, but would be interested in also accommodating a version for the 3D.
Thanks!
Sorry this took me so long to respond. I needed to get onto my computer to get this to work. What kind of experience do you have with making 3d files. I will be honest. My design is not perfect. What I did was I pulled the original Laser cut pattern into tinkercad and then rebuilt it piece by piece. I can share my file link in tinkercad or we can find another way to exchange it.
I was wondering if you have made your design files available. I bought one of the early crowd-sourced shake boards and have always wanted to get a case for it. I’ve been using M2 inserts in my printed models, they are easy to use. I would like to modify your design slightly to accommodate these inserts.